seydlitz_slith
Posts: 2036
Joined: 6/16/2002
From: Danville, IL
Status: offline

|
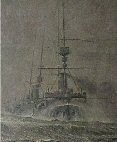
At Madang the Aussie cruisers showed up and sank my task force before they could escape. Casualties included the training cruiser Kashima which went down fighting.
--------------------------------------------------------------------------------
Night Time Surface Combat, near Madang at 97,123, Range 10,000 Yards
Japanese aircraft
no flights
Japanese aircraft losses
No Japanese losses
Japanese Ships
CL Kashima, Shell hits 8, Torpedo hits 1, and is sunk
PB Chiyo Maru #4, Shell hits 22, and is sunk
PB Choko Maru #2, Shell hits 24, and is sunk
PB Nikkai Maru, Shell hits 42, and is sunk
xAK Hokkai Maru, Shell hits 31, and is sunk
xAK Ryunan Maru, Shell hits 31, and is sunk
xAK Kazan Maru, Torpedo hits 1, and is sunk
xAK Eizan Maru, Shell hits 26, and is sunk
xAK Yae Maru, Shell hits 21, and is sunk
Allied Ships
CA Canberra, Shell hits 1
CL Perth
DD Voyager
DD La Triomphant
Japanese ground losses:
505 casualties reported
Squads: 71 destroyed, 56 disabled
Non Combat: 14 destroyed, 12 disabled
Engineers: 0 destroyed, 0 disabled
Guns lost 16 (6 destroyed, 10 disabled)
Reduced sighting due to 3% moonlight
Maximum visibility in Clear Conditions and 3% moonlight: 12,000 yards
Range closes to 18,000 yards...
Range closes to 15,000 yards...
Range closes to 12,000 yards...
CONTACT: Japanese lookouts spot Allied task force at 12,000 yards
Japanese ships attempt to get underway
Range closes to 10,000 yards...
CONTACT: Allied lookouts spot Japanese task force at 10,000 yards
CA Canberra engages CL Kashima at 10,000 yards
CL Kashima engages CL Perth at 10,000 yards
DD Voyager engages PB Chiyo Maru #4 at 10,000 yards
xAK Kazan Maru sunk by DD La Triomphant at 10,000 yards
Range closes to 8,000 yards
CL Perth engages CL Kashima at 8,000 yards
CL Perth engages PB Nikkai Maru at 8,000 yards
DD La Triomphant engages xAK Eizan Maru at 8,000 yards
CL Kashima engages DD Voyager at 8,000 yards
DD Voyager engages xAK Eizan Maru at 8,000 yards
Range closes to 4,000 yards
CL Kashima engages CA Canberra at 4,000 yards
CL Perth engages PB Nikkai Maru at 4,000 yards
CL Kashima sunk by DD La Triomphant at 4,000 yards
CA Canberra engages PB Chiyo Maru #4 at 4,000 yards
CA Canberra engages xAK Yae Maru at 4,000 yards
DD Voyager engages xAK Eizan Maru at 4,000 yards
DD Voyager engages xAK Hokkai Maru at 4,000 yards
Range closes to 2,000 yards
CA Canberra engages PB Nikkai Maru at 2,000 yards
CL Perth engages PB Nikkai Maru at 2,000 yards
CA Canberra engages xAK Yae Maru at 2,000 yards
DD Voyager engages xAK Eizan Maru at 2,000 yards
Range increases to 3,000 yards
CA Canberra engages PB Nikkai Maru at 3,000 yards
CL Perth engages PB Choko Maru #2 at 3,000 yards
CL Perth engages PB Chiyo Maru #4 at 3,000 yards
DD Voyager engages PB Nikkai Maru at 3,000 yards
DD Voyager engages xAK Eizan Maru at 3,000 yards
DD La Triomphant engages xAK Hokkai Maru at 3,000 yards
CA Canberra engages PB Nikkai Maru at 3,000 yards
CL Perth engages PB Nikkai Maru at 3,000 yards
DD La Triomphant engages PB Nikkai Maru at 3,000 yards
DD Voyager engages xAK Yae Maru at 3,000 yards
DD Voyager engages xAK Eizan Maru at 3,000 yards
DD Voyager engages xAK Ryunan Maru at 3,000 yards
DD La Triomphant engages xAK Hokkai Maru at 3,000 yards
Range closes to 2,000 yards
CA Canberra engages PB Nikkai Maru at 2,000 yards
CL Perth engages xAK Yae Maru at 2,000 yards
DD Voyager engages xAK Yae Maru at 2,000 yards
DD Voyager engages xAK Eizan Maru at 2,000 yards
DD La Triomphant engages xAK Ryunan Maru at 2,000 yards
DD Voyager engages xAK Hokkai Maru at 2,000 yards
CA Canberra engages PB Nikkai Maru at 2,000 yards
CL Perth engages PB Choko Maru #2 at 2,000 yards
PB Nikkai Maru sunk by DD La Triomphant at 2,000 yards
DD La Triomphant engages xAK Yae Maru at 2,000 yards
DD Voyager engages xAK Eizan Maru at 2,000 yards
CA Canberra engages xAK Ryunan Maru at 2,000 yards
CA Canberra engages PB Choko Maru #2 at 2,000 yards
CL Perth engages xAK Hokkai Maru at 2,000 yards
DD La Triomphant engages xAK Eizan Maru at 2,000 yards
DD Voyager engages xAK Hokkai Maru at 2,000 yards
DD Voyager engages xAK Hokkai Maru at 2,000 yards
CA Canberra engages PB Choko Maru #2 at 2,000 yards
CL Perth engages PB Choko Maru #2 at 2,000 yards
DD La Triomphant engages xAK Hokkai Maru at 2,000 yards
DD La Triomphant engages xAK Ryunan Maru at 2,000 yards
DD Voyager engages xAK Hokkai Maru at 2,000 yards
PB Choko Maru #2 sunk by CA Canberra at 2,000 yards
CL Perth engages xAK Ryunan Maru at 2,000 yards
CA Canberra engages xAK Ryunan Maru at 2,000 yards
Range increases to 4,000 yards
CA Canberra engages xAK Ryunan Maru at 4,000 yards
CL Perth engages xAK Ryunan Maru at 4,000 yards
DD Voyager engages xAK Hokkai Maru at 4,000 yards
Range increases to 5,000 yards
CL Perth engages PB Chiyo Maru #4 at 5,000 yards
DD La Triomphant engages xAK Ryunan Maru at 5,000 yards
DD Voyager engages xAK Hokkai Maru at 5,000 yards
xAK Hokkai Maru sunk by DD Voyager at 5,000 yards
Range closes to 4,000 yards
CA Canberra engages PB Chiyo Maru #4 at 4,000 yards
DD La Triomphant engages PB Chiyo Maru #4 at 4,000 yards
Range closes to 3,000 yards
CA Canberra engages PB Chiyo Maru #4 at 3,000 yards
DD La Triomphant engages PB Chiyo Maru #4 at 3,000 yards
DD Voyager engages PB Chiyo Maru #4 at 3,000 yards
PB Chiyo Maru #4 sunk by CL Perth at 3,000 yards
PB Chiyo Maru #4 sunk by CL Perth at 3,000 yards
Combat ends with last Japanese ship sunk...

 Attachment (1) Attachment (1)
|
 Printable Version
 RE: AE Historical Game Project 2. Traskott (allies) vs.... -


 New Messages
 No New Messages
 Hot Topic w/ New Messages
 Hot Topic w/o New Messages
 Locked w/ New Messages
 Locked w/o New Messages
 Post New Thread