mind_messing
Posts: 3393
Joined: 10/28/2013
Status: offline

|
April 1st to April 2nd, 1942
North Pacific
The USAAF raids on Adak are opposed by a single sqadron of 16 Zeros. They started off the war as rookie pilots for the IJNAF, and ended up being thrown into the Aleutians to provide token opposition to Allied raids on Adak. In this resepct they've excelled. Few bombers are shot down outright, but even a handfull of B-17s failing to make it home or stuck for a few days on the run-way is an excellent exchange rate.
Beside the occasional air intercepts of raids on Adak, the war in the north has wound down, for the time being.
Central Pacific
A big supply shipment arrives at Tabiteuea, some of which goes towards creating midget subs. Together with the bases minefield, it will make bombardment runs slightly more difficult.
Kwajalein is running low on fuel again. The number of ASW patrols assigned to the base is cut back, and a regular oiler convoy schedualed to run from Tarakan is established, and should keep this base topped up nicely.
South-West Pacific
Nell's flying from Tulagi hit a small Allied convoy off Vanua Lava at the top of the New Hebrides chain. The Allies were likely trying to get boots on the ground in order to exploit this base for a move on Ndeni.
With Tulagi the only Japanese base within distance to support Ndeni, the importance of developing Lunga on Guadalcanal is clear, and an engineer unit is already planned to be landed.
Further south, the KB heads north-west. Suprise is blown, and the risk of fragmented strikes being cut apart by Allied CAP or flak over Sydney is no longer worth the risk, considering that most Allied ships will have likely fled. As some small measure of compensation, the KB will strike Townsville, which has a light crusier and some submarines hiding in port and has only a dozen or so fighters defending it.
Austrailia
The highlight of the day occurs off Exmouth. The Mini-KB, supported by the Fuso, Ise and Hyuga, push west from Broome following the reported sighting of carriers on April 1st. Based on sightings and aircraft counts, the assumption is made that the carriers are British, and the Mini-KB seeks an engagement on the 2nd.
The battle turns out to be an overwhelming victory for the IJN, the second carrier clash of the war follows the first in that no Japanese ships are even damaged.
The battle opens with a string of torpedos smashing in to the side of the light carrier Hermes, dealing her a fatal blow. The Formidable takes two torpedos and three bombs and despite her armoured deck shielding her from bomb damage, she shows signs of heavy damage after suffering an ammo explosion.
The battleship Resolution takes a torpedo for her troubles, but the carrier Indomitable escapes with just two bombs exploding on her flight deck.
The British counter-strike is pitfull. 26 Albacores and Swordfish torpedo bombers, without any escort, attempt to attack the Japanese carriers. Spotted at 39 NM, the Japanese CAP had 25 minuites to halt the strike, and the unescorted British bombers were wiped out.
Damage report as follows:
Allied Ships
CV Formidable, Bomb hits 3, Torpedo hits 2, on fire, heavy damage (Ammo storage explosion, suspected sunk)
CVL Hermes, Torpedo hits 3, heavy damage (confirmed sunk)
BB Resolution
CV Indomitable, Torpedo hits 1
BB Ramillies
CL Enterprise
Allied Ships
BB Ramillies
CV Indomitable, Bomb hits 2
BB Resolution, Bomb hits 2, Torpedo hits 1, on fire
CL Durban
CL Dauntless
CL Emerald
CA Dorsetshire, Bomb hits 1
Despite the temptation to pursue, the Japanese carriers will withdraw eastwards, back under the air umbrella afforded by the airbase at Broome.
The justifcation for such a move is as follows:
- Confirmed sightings of the USN fleet carriers haven't occured for at least four/five days now
- Allied activity in the past month off North-Western Austrailia has included obvious baiting operations: unescorted convoys in the middle of the ocean, combat ships present without air cover ect.
- Allied subs in the lower DEI may have provided the Allies with enough warning to sortie the USN fleet carriers to a position outside Japanese search plane coverage (if they are not there already), leaving the Japanese carriers to blindly stumble into an engagement where they are outnumbered.
- The possible gains of a pursuit of the defeated British force does not merit the risk. The chance of destroying one British carrier and one old British battleship does not merit the possible destruction of some or all of the Mini-KB.
 The situation off North-Western Austrailia The situation off North-Western Austrailia
Nevertheless, two heavy crusier Kako and two destroyers will attempt to intercept the British fleet, and the heavy battleship force will destroy the Allied convoy unloading at Exmouth. The tempting target of Allied ships unloading at Carnarvon will be ignored as being an invitation to be ambushed. The Japanese carriers will withdraw slightly to the north and provide LR CAP over these moves before withdrawing to the north-east.
On land, Wyndham's level 2 airbase is nearly complete. Once finished, this will enable sweeps to start, giving Japanese bombers a free hand to start striking at the Allied bases and troops in and around Darwin.
Burma
Preparations for an offensive to capture Akyab and destroy the 20 Allied units defending it are underway. Three Japanese divisions and two Thai divisions, as well as a great deal of artillery will be deployed to this end. If possible, the troops will be trapped by Japanese troops occuping the road north to British India and the base itself subjected to heavy air and sea bombardment.
To celebrate the start of preparations, a big IJAAF sweep is ordered to go against Chittagong.
A further division will likely be allocated to Burma from the DEI to serve as a strategic reserve for this theater.
China
Troops crossing in to Chungking from the south are badly mauled in the mandatory shock attack. Chinese adjusted AV is over 15k. The bulk of some five thousand Japanese losses falls on the 60th Division, which narrowly avoids being wiped out.
The survivors are rewarded with the news that they've been reallocated to the Southern Army for the bargin basement price of 116 political points. Two Mixed Brigades are being sacraficed to close the remaining two river hex-sides, and they'll either be bought out destroyed or rebuilt for use in the Pacific.
These reinforcements bring Japanese strength in to about 4.7k AV to 6.2k Chinese AV. Some 3.4k Japanese AV has still to arive for the siege.
Bombing of the Kunming mountain bastion continues.
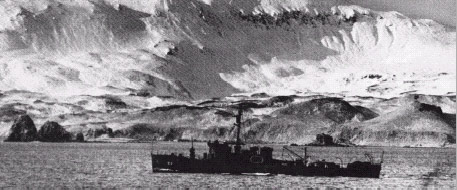
 The HMS Hermes, struck by a trio of torpedos, slipped below the waves shortly after the first Japanese strike departed. The HMS Hermes, struck by a trio of torpedos, slipped below the waves shortly after the first Japanese strike departed.
< Message edited by mind_messing -- 9/25/2014 5:46:19 PM >
|
 Printable Version
 RE: Another Question to the Gallery: R&D -


 I use one TF for this area.

 RE: Yamashiro avenged! -
 Just had an American S-boat get hit at Wyndham with over 80 flood damage (less than 50 major) limp back to Townsville on cruise speed. She'll be back in action soon.


 New Messages
 No New Messages
 Hot Topic w/ New Messages
 Hot Topic w/o New Messages
 Locked w/ New Messages
 Locked w/o New Messages
 Post New Thread