Matrix Games Forums

Forums  Register  Login  Photo Gallery  Member List  Search  Calendars  FAQ 

My Profile  Inbox  Address Book  My Subscription  My Forums  Log Out

REVIEW - Brad Leyte's Let's go to war

 
View related threads: (in this forum | in all forums)

Logged in as: Guest
Users viewing this topic: none
  Printable Version
All Forums >> [Current Games From Matrix.] >> [Modern] >> Larry Bond's Harpoon - Commander's Edition >> After Action Reports >> REVIEW - Brad Leyte's Let's go to war Page: [1]
Login
Message << Older Topic   Newer Topic >>
REVIEW - Brad Leyte's Let's go to war - 5/18/2009 12:39:05 AM   
Stalintc


Posts: 291
Joined: 8/2/2006
From: Bristol UK
Status: offline
Scenario: Lets go to war
Author: Brad Leyte (CV32)
Battleset: Westpac
Database: HCDB
Skill level: Advanced\Expert
Involved units: Full (Land\Sea\Air operations)
Where can I get it? Here (Harpgamer)


Review:

First impressions:

On first opening the scenario I am greeted with an enormous order of battle and a very wide area of operations. Before engaging the clock it was of the utmost importance that I got dug in to the OOB and the scenario orders. Processing that and setting up my combat units and orders took me in the region of 1 and half to 2 hours. I had never opened a monster scenario, so this was my first taste of such a beast, I was determined to beat it at any cost.

I found the range of units at my disposal to be impressive ranging from carrier groups outfitted with the F-18 super hornet to bombers like the B1 Lancer. I felt very much from the outtake that I had the kit to get the job done. However these more advanced units were a long way from the front and I could see striaght away that some tactical ferry operations were going to have to be well planned to get the right coverage. (This was permitted in the scenario orders for certain units. Take heed of the units you are "allowed" to transfer to get the best out of the scenario) At the very front in the Japenese\Taiwanese\Korean and Vietnam sectors the air units available were basic and appeared to have been placed to give you a tough start to the scenario and get you thinking how their strengths and weaknesses can be combined to hold out till the real hardcore hardware gets into battle.

The RED side had been given a huge number of units that one would expect from a joint Chinese\Russian effort, that sent complete shivers of terror all over, especially when I noticed there were long range missile installations present for the Chinese...

I was not prepared for the coming chaos that ensued.

Gameplay:

Straight from the word go, the Chinese were unleashing hell on my forces, the long range fearsome D-21 missiles did not take long to get into play and were stretching my air defences to the limit. I swear I have never sweat so much playing a HCE as I have playing this one.

All the way through the game the combined RED airforces were completely un-relenting, requiring everything I had mentally to keep the situation stable and keep one step ahead of the RED side. Various considerations when forming my CAP's and inner defences had to take into account, catching missile salvos and aircraft.

Halfway through I had practically lost the Japenese set of airbases due to overwhleming attacks from the Russian controlled units of RED and I was forced to evacuate one airfield of its assets in order to preserve their availability later in the scenario. I did not wish those assets to suffer the same fate as those at the airbase of Chitose, which were annihalated in a combination of air and TBM attacks.

I found keeping my naval assets a secret very stressful and on many occasions the position of a key carrier group was nearly compromised by snooping TU-95's and other naval recon aircraft.

Despite the chaos, I kept the air to air kill ratio steady and limited losses as much as possible. Taipei was the key airbase where most of the air action was taking place, I came close on several occasions to getting overwhelmed by the highly numerous air power of the local Chinese air forces. However the turn in the tide came when I had brought the allowed aircraft to the front and began to engage them in the air war which kept the kill ratio at a steady 1 loss for 10 kills.

The heavy naval incursion around Taiwan meant that the need to back off my heavily fatigued battle group stationed there a neccesity leaving Taipei all alone with its compliment of aircraft.

Gradually the RED naval assets began to succumb to my well placed multi vector attacks leaving many of the remaining vessels crippled and running for home.

Seat of your pants action or what?!

Conclusion:

Again, another Brad Leyte scenario worthy of an award if there were ever such a thing. The amount of effort this must have taken to make the AI so durable, flexible and aggressive must have been incredible and I take my hat off to the man who put together something as extravegant and exciting as this.

I did not want to AAR this scenario, because there are so many things designed to catch you out and keep you gripped that it would be sacriledge to expose it to the those who have not yet had the priviledge.

For those lovers of the monster scenario, this would be high on my recommendations list, this is only the first I have played, but it has left me not only exhausted, by gasping for more.

One small thing I had picked up on however is that the time fram which the scenario takes place 72 hours, seems a little too long to me for the time it took me to claim a total victory. But none the less it leaves things open for a varied range of play styles to accustom.

Im off to go pick my jaw up from the floor....

The Score 96%


_____________________________

HCE Beta Tester
HCE Icon Mod available here
HCE Sound Mod available here
Post #: 1
RE: REVIEW - Brad Leyte's Let's go to war - 5/24/2009 2:48:44 PM   
mack2


Posts: 243
Joined: 6/29/2007
Status: offline
I've been playing this for the last alot of hours (time flies, even with 1-1 compression for most of the scenario).

With 3 days, 19 hours left to go, it looks like:
Blue:
Carriers - 0 Destroyed or Damaged.
Ships - 12 Destroyed, 2 Damaged.
Aircraft - 50 Destroyed.
Helos - 10 Destroyed.
Bases - 4 Damaged.

Red:
Carriers - 1 Destroyed (hmmn.)
Ships - 21 Destroyed, 2 Damaged.
Aircraft - 304 Destroyed.
Helos - 2 Destroyed.
Bases - 2 Destroyed, 3 Damaged

I've just started getting the Lancers and Spirits involved, those are the reason why Red has damaged bases. The 52's Cruise Missile have a huge range but are very, very slow.

I also made the mistake of trying to ferry aircraft when I really shouldn't have, and lost a few very expensive units, luckily none of the ones that actually shoot things, but still, a real commander would probably get cashiered for having multiple E-6's, E-3's and other expensive C3I planes shot down, that's if he wasn't actually on the things when they got shot down.

Despite this, and many other scenarios where people say they had a rain of ballistic missiles, I've never really had a problem with them for some reason. I think I had one unimportant base damaged and that was about it.

I've already had the "Total Loss" come up, but I'm still shooting, and I'm still getting headshots, it's like boom headshot, boom headshot... booooooom headshoooot.

Ahem.

(in reply to Stalintc)
Post #: 2
RE: REVIEW - Brad Leyte's Let's go to war - 5/25/2009 2:42:44 PM   
mack2


Posts: 243
Joined: 6/29/2007
Status: offline
I got through another 5 hours of game-time today (in about 3 and a half real-time hours), I've started clearing out the Chinese bases in the vicinity of the Taiwanese base at Tapei Sungshan, as well as demolishing a naval SAG that was threatening a carrier group.

It got a bit hairy, I felt like the Japanese at Midway, watching with every squadron of Hornets re-arming with Slammers to take out the Russian Sag for good, only to see waves of bombers and fighters incoming to the Carrier. We barely escaped with the minor loss of one of the auxiliary ships placed in a sacrificial missile trap protecting the carrier. There was also a submarine torpedo attack, but we outran the torps, and without any Vikings to properly prosecute the target (I don't know how a real carrier commander can sleep at night anymore, knowing he doesn't have any Vikings to sweep the sea).

After recalling the attempt to ferry planes from Earekson, the F-22's defended the airbase whilst the handful of B-52's unleashed wave after wave of missiles at the Russian bases at Petropavlosk and Buresetvik.

I had to pretty much abandon Japan, and only had a dozen or so planes to defend Korea. The most important base by far is Tapei Sungshan, I built up a force of F-22's, F-16's, and eventually our B1, B-52's and B-2's.

A constant air war has been waged, with the F16D Block 50's  and B1's the main hitters against the enemy air-bases with JASSM, F15's with AGM-130's taking the SEAD mission, the A-10's have attacked and destroyed a dozen smaller red naval units, whilst the F22's and F16 Block 20's defend the airspace with AMRAAM.

My blue forces in Da Nang have taken a pounding, only 2 of the Flankers left, all the A-10's shot down attempting to defend the small Blue naval force in the area.

Any non-US ship not part of a Carrier group was pretty well annihilated, all the Japanese (that aren't part of the CVH Group), South Korean and Vietnamese ships sunk by massed missile attack.

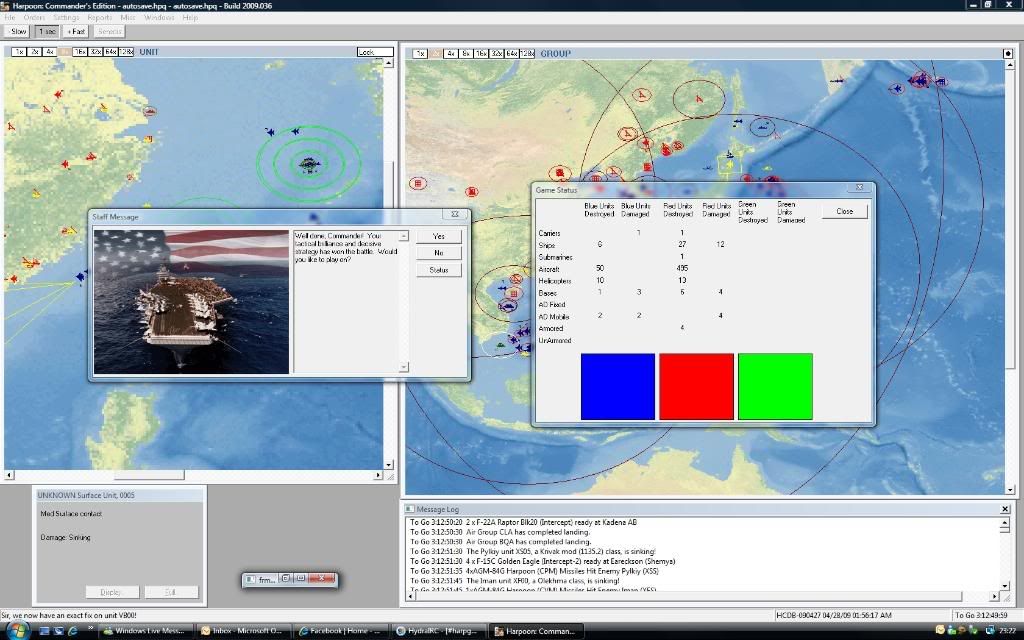
The losses are truly staggering, some of the largest I've seen in any scenario, on both sides.
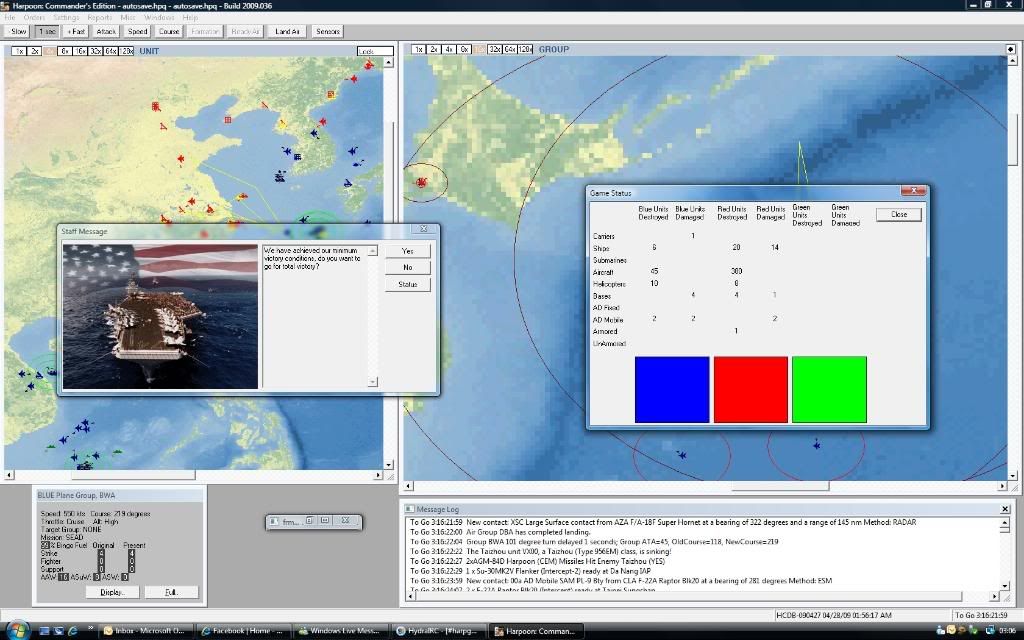
Blue:
Carriers - 0 Damaged or Destroyed.
Ships - 12 Destroyed, 2 Damaged.
Subs - 0 Damaged or Destroyed.
Aircraft - 65
Helos - 20
Bases - 1 Destroyed, 5 Damaged.
Land Units - 2 Destroyed, 2 Damaged.

Red:
Carriers - 1 Destroyed.
Ships - 41 Destroyed, 1 Damaged.
Subs - 0 Damaged or Destroyed.
Aircraft - 782 Destroyed.
Helos - 23 Destroyed.
Bases - 14 Destroyed, 4 Damaged
Land Units - 13 Destroyed, 2 Damaged.

Green:
Ships - 1 Damaged, sorry to whoever owns it, the Japanese Helo Carrier group put a couple of Harpoons into a green tanker with a BOL when it was still unknown. I also engaged some whales but the 2 high-tech torpedoes managed to miss the whale somehow.

(in reply to mack2)
Post #: 3
RE: REVIEW - Brad Leyte's Let's go to war - 5/26/2009 9:40:48 AM   
mack2


Posts: 243
Joined: 6/29/2007
Status: offline
I finally finished this absolute monster scenario today. After mopping up most of the Chinese forces near Taiwan, I turned my attention to the Russian and North Koreans. Cruise missile attacks strikes from the B-52's took out the Russian bases on the mainland, whilst F-15K strikes did the damage on enemy shipping and bases. Hornet strikes from the Reagan saved Da Nang from being destroyed by forces from Lingshui.

After the 52's and B1's took out the Chinese Missile bases, air raid sirens blew over Beijing as the B-1's attacked targets at Yuquan Shan and the PLAAF base. SSGN Michigan launched a salvo of 70 Tomahawks at the Hochon Missile Base, with a SEAD mission conducted by F15E on the SA2's defending it.

Sporadic contact was made with enemy shipping and air forces, and were quickly destroyed, A-10's attacked the small naval force headed by a Krivak frigate and took it out. Dalian was the last target to fall, the Chinese Port taking massive damage from yet more B-52 attacks.

Losses:
Blue:
Carriers - 0 Damaged or Destroyed.
Ships - 13 Destroyed, 1 Damaged.
Subs - 0 Damaged or Destroyed.
Aircraft - 84 Destroyed.
Helos - 20 Destroyed.
Bases - 1 Destroyed, 5 Damaged.
Land Units - 2 Destroyed, 2 Damage.

Red
Carriers - 1 Destroyed.
Ships - 51 Destroyed.
Aircraft - 1,300 Destroyed.
Helos - 33 Destroyed.
Bases - 36 Destroyed.
Land - 31 Destroyed.

(in reply to mack2)
Post #: 4
RE: REVIEW - Brad Leyte's Let's go to war - 5/26/2009 10:59:56 AM   
Stalintc


Posts: 291
Joined: 8/2/2006
From: Bristol UK
Status: offline
Wow thanks for posting that Mack, great read!

Looks like you handed the combined communist forces a good slapping! *salute*

Well played!

_____________________________

HCE Beta Tester
HCE Icon Mod available here
HCE Sound Mod available here

(in reply to mack2)
Post #: 5
RE: REVIEW - Brad Leyte's Let's go to war - 5/26/2009 3:34:39 PM   
CV32


Posts: 1046
Joined: 5/15/2006
From: The Rock, Canada
Status: offline
Thanks for the AAR's, guys.

Looks like the only ones to come away unscathed from mack's run were the bubbleheads.

_____________________________

Brad Leyte
HC3 development group member for HCE
Author of HCDB official database for HCE
Harpgamer.com Co-Owner

(in reply to Stalintc)
Post #: 6
RE: REVIEW - Brad Leyte's Let's go to war - 5/30/2009 7:25:54 PM   
jjnotme


Posts: 20
Joined: 9/24/2007
Status: offline
Hi
when I start the scenario I get, getdiskannex error but, it lets me play. In the scenario editor it kick's me out. also where can I find the db you used? HCDB-081124. I'm playing with HPCD .44 patch.

Thanks.

(in reply to Stalintc)
Post #: 7
Page:   [1]
All Forums >> [Current Games From Matrix.] >> [Modern] >> Larry Bond's Harpoon - Commander's Edition >> After Action Reports >> REVIEW - Brad Leyte's Let's go to war Page: [1]
Jump to:


New Messages No New Messages
Hot Topic w/ New Messages Hot Topic w/o New Messages
Locked w/ New Messages Locked w/o New Messages
 Post New Thread
 Reply to Message
 Post New Poll
 Submit Vote
 Delete My Own Post
 Delete My Own Thread
 Rate Posts


Forum Software © ASPPlayground.NET Advanced Edition 2.4.5 ANSI

0.625