Matrix Games Forums

Forums  Register  Login  Photo Gallery  Member List  Search  Calendars  FAQ 

My Profile  Inbox  Address Book  My Subscription  My Forums  Log Out

RE: AAR 42

 
View related threads: (in this forum | in all forums)

Logged in as: Guest
Users viewing this topic: none
  Printable Version
All Forums >> [New Releases from Matrix Games] >> War in the Pacific: Admiral's Edition >> After Action Reports >> RE: AAR 42 Page: <<   < prev  8 9 [10] 11 12   next >   >>
Login
Message << Older Topic   Newer Topic >>
RE: AAR 42 - 12/3/2021 1:36:45 PM   
castor troy


Posts: 14330
Joined: 8/23/2004
From: Austria
Status: offline
--------------------------------------------------------------------------------
Day Time Surface Combat, near Koepang at 68,116, Range 24,000 Yards


Japanese aircraft
no flights

Japanese aircraft losses
F1M2 Pete: 1 destroyed
E13A1 Jake: 1 destroyed

Japanese Ships
BB Hiei, Shell hits 12, and is sunk
CA Haguro, Shell hits 11, on fire
CA Suzuya, Shell hits 9, on fire
CA Kumano, Shell hits 6, Torpedo hits 1, heavy fires, heavy damage
CA Kinugasa, Shell hits 10, heavy fires, heavy damage
CL Naka, Shell hits 12, and is sunk
CL Yura, Shell hits 9, heavy fires
CL Abukuma, Shell hits 7, heavy fires, heavy damage
DD Akigumo, Shell hits 1, and is sunk
DD Maikaze, Shell hits 5, heavy fires, heavy damage
DD Isokaze, Shell hits 2
DD Shiranui, Shell hits 1, Torpedo hits 1, and is sunk
DD Amatsukaze, Shell hits 12, heavy fires, heavy damage
AK Sado Maru, Shell hits 5, and is sunk
xAK Aobasan Maru, Shell hits 5, and is sunk
xAK Yamaura Maru, Shell hits 4, and is sunk
xAP Asama Maru, Shell hits 5, heavy fires, heavy damage
xAP Husimi Maru, Shell hits 4, Torpedo hits 1, and is sunk
xAP Miike Maru, and is sunk
xAP Yoshino Maru, Shell hits 3, and is sunk
xAP Kanzyu Maru, Shell hits 14, and is sunk
xAP Manzyu Maru, Shell hits 7, heavy fires, heavy damage

Allied Ships
BB Prince of Wales
CA Australia, Shell hits 4, on fire
CA Canberra, Shell hits 7, Torpedo hits 1, on fire, heavy damage
CL Perth, Shell hits 2, on fire
CL Hobart, Shell hits 4
CL Honolulu, Shell hits 2
CL Phoenix, Shell hits 2
DD Nestor, Shell hits 9, heavy fires, heavy damage
DD Napier
DD Nizam, Shell hits 1
DD Norman
DD Electra, Shell hits 1, on fire
DD Encounter
DD Express
DD Fortune, Shell hits 1, heavy fires
DD Isis
DD Jupiter, Shell hits 2

Japanese ground losses:
17854 casualties reported
Squads: 522 destroyed, 356 disabled
Non Combat: 675 destroyed, 558 disabled
Engineers: 116 destroyed, 21 disabled
Guns lost 378 (318 destroyed, 60 disabled)
Vehicles lost 231 (168 destroyed, 63 disabled)


then it was the turn of Force Z (which I expected to engage first to be honest) and what the USN started was completed by Force Z... BB Hiei heavily stricken already she was finished by Prince of Wales and this time also the IJN cruiser took a beating... CA Canberra is in sinking condition but after two engagements there's not much left of the enemy convoy and the heavy escort... looking at the ground losses we must have destroyed way over two divisions today which is as severe for the enemy as the ship losses...


Maximum visibility in Partly Cloudy Conditions: 28,000 yards
CONTACT: Japanese lookouts spot Allied task force at 24,000 yards
CONTACT: Allied lookouts spot Japanese task force at 24,000 yards
BB Prince of Wales engages CA Kinugasa at 24,000 yards
CA Kinugasa engages CA Australia at 24,000 yards
CA Canberra engages CA Suzuya at 24,000 yards
CL Hobart engages CA Kinugasa at 24,000 yards
CL Hobart engages CL Yura at 24,000 yards
CA Australia engages DD Amatsukaze at 24,000 yards
BB Prince of Wales engages DD Maikaze at 24,000 yards
Range closes to 23,000 yards
CA Canberra engages CA Kinugasa at 23,000 yards
CA Australia engages CA Haguro at 23,000 yards
CL Hobart engages CA Suzuya at 23,000 yards
CA Australia engages CA Haguro at 23,000 yards
BB Prince of Wales engages DD Isokaze at 23,000 yards
CA Kumano engages DD Nizam at 23,000 yards
BB Prince of Wales engages xAK Yamaura Maru at 23,000 yards
BB Prince of Wales engages xAK Aobasan Maru at 23,000 yards
Range closes to 21,000 yards
BB Hiei engages BB Prince of Wales at 21,000 yards
CA Kinugasa engages CA Canberra at 21,000 yards
CA Australia engages CA Kumano at 21,000 yards
CL Phoenix engages CA Suzuya at 21,000 yards
CL Honolulu engages CL Abukuma at 21,000 yards
CL Yura engages CL Hobart at 21,000 yards
CA Australia engages DD Amatsukaze at 21,000 yards
BB Prince of Wales engages DD Maikaze at 21,000 yards
DD Akigumo sunk by BB Prince of Wales at 21,000 yards
BB Prince of Wales engages xAP Yoshino Maru at 21,000 yards
BB Prince of Wales engages xAK Yamaura Maru at 21,000 yards
Range closes to 18,000 yards
BB Hiei engages BB Prince of Wales at 18,000 yards
CL Hobart engages CA Kinugasa at 18,000 yards
CL Yura engages CA Australia at 18,000 yards
CA Suzuya engages CA Australia at 18,000 yards
CA Kumano engages CL Honolulu at 18,000 yards
CA Kinugasa engages CL Perth at 18,000 yards
DD Amatsukaze engages DD Jupiter at 18,000 yards
DD Isokaze engages DD Express at 18,000 yards
BB Prince of Wales engages AK Sado Maru at 18,000 yards
DD Nestor engages DD Amatsukaze at 18,000 yards
BB Prince of Wales engages xAK Aobasan Maru at 18,000 yards
Range closes to 16,000 yards
BB Hiei engages BB Prince of Wales at 16,000 yards
CA Canberra engages CA Kumano at 16,000 yards
CA Kumano engages CA Australia at 16,000 yards
CL Phoenix engages CA Kinugasa at 16,000 yards
CA Haguro engages CL Honolulu at 16,000 yards
CA Suzuya engages CL Hobart at 16,000 yards
CL Yura engages CL Perth at 16,000 yards
DD Isokaze engages DD Jupiter at 16,000 yards
DD Express engages DD Amatsukaze at 16,000 yards
DD Shiranui engages DD Nestor at 16,000 yards
DD Isokaze engages DD Express at 16,000 yards
DD Maikaze engages DD Encounter at 16,000 yards
DD Electra engages DD Shiranui at 16,000 yards
DD Nizam engages DD Amatsukaze at 16,000 yards
DD Nestor engages xAP Yoshino Maru at 16,000 yards
Range closes to 14,000 yards
CA Canberra collides with DD Isis at 68 , 116
BB Prince of Wales engages BB Hiei at 14,000 yards
CA Suzuya engages CA Canberra at 14,000 yards
CA Kumano engages CL Phoenix at 14,000 yards
CA Haguro engages CA Australia at 14,000 yards
CL Abukuma engages CL Hobart at 14,000 yards
CA Australia engages CL Yura at 14,000 yards
DD Amatsukaze engages DD Jupiter at 14,000 yards
DD Amatsukaze engages DD Isis at 14,000 yards
DD Electra engages DD Shiranui at 14,000 yards
DD Isokaze engages DD Napier at 14,000 yards
DD Isokaze engages DD Encounter at 14,000 yards
DD Amatsukaze engages DD Electra at 14,000 yards
DD Norman engages xAP Manzyu Maru at 14,000 yards
DD Nestor engages xAP Husimi Maru at 14,000 yards
Range closes to 11,000 yards
BB Hiei engages BB Prince of Wales at 11,000 yards
CA Kinugasa engages CA Canberra at 11,000 yards
CA Kumano engages CA Australia at 11,000 yards
CA Suzuya engages CL Hobart at 11,000 yards
CL Abukuma engages CL Honolulu at 11,000 yards
CL Abukuma engages CL Hobart at 11,000 yards
CL Perth engages CL Yura at 11,000 yards
DD Jupiter engages DD Shiranui at 11,000 yards
DD Amatsukaze engages DD Fortune at 11,000 yards
DD Fortune engages DD Shiranui at 11,000 yards
DD Isokaze engages DD Express at 11,000 yards
DD Express engages DD Maikaze at 11,000 yards
DD Nestor engages AK Sado Maru at 11,000 yards
DD Nizam engages xAP Manzyu Maru at 11,000 yards
DD Isis engages xAP Husimi Maru at 11,000 yards
DD Nestor engages xAP Asama Maru at 11,000 yards
Range closes to 8,000 yards
BB Hiei sunk by BB Prince of Wales at 8,000 yards
CA Canberra engages CA Suzuya at 8,000 yards
CA Australia engages CA Kumano at 8,000 yards
CA Suzuya engages CL Hobart at 8,000 yards
CA Haguro engages CL Phoenix at 8,000 yards
CA Suzuya engages CL Hobart at 8,000 yards
CL Yura engages CL Honolulu at 8,000 yards
DD Shiranui engages DD Jupiter at 8,000 yards
DD Amatsukaze engages DD Isis at 8,000 yards
DD Isokaze engages DD Fortune at 8,000 yards
DD Maikaze engages DD Express at 8,000 yards
DD Maikaze engages DD Encounter at 8,000 yards
DD Shiranui engages DD Electra at 8,000 yards
DD Maikaze engages DD Norman at 8,000 yards
DD Maikaze engages DD Nizam at 8,000 yards
DD Isis engages xAP Husimi Maru at 8,000 yards
DD Amatsukaze engages DD Nestor at 8,000 yards
Range closes to 5,000 yards
CA Kinugasa engages CL Hobart at 5,000 yards
CA Kumano engages CL Perth at 5,000 yards
CA Suzuya engages CA Australia at 5,000 yards
CA Haguro engages CL Hobart at 5,000 yards
CL Abukuma engages CL Hobart at 5,000 yards
CL Yura engages CL Perth at 5,000 yards
CL Naka engages CL Perth at 5,000 yards
DD Jupiter engages DD Amatsukaze at 5,000 yards
DD Shiranui sunk by DD Nestor at 5,000 yards
DD Maikaze engages DD Fortune at 5,000 yards
DD Encounter engages xAP Manzyu Maru at 5,000 yards
xAP Husimi Maru sunk by DD Nizam at 5,000 yards
DD Amatsukaze engages DD Napier at 5,000 yards
DD Nestor engages DD Amatsukaze at 5,000 yards
Range increases to 6,000 yards
CL Yura engages BB Prince of Wales at 6,000 yards
CA Canberra engages CA Kumano at 6,000 yards
CA Suzuya engages CL Honolulu at 6,000 yards
CA Suzuya engages CL Phoenix at 6,000 yards
CL Abukuma engages CA Canberra at 6,000 yards
CL Hobart engages CA Haguro at 6,000 yards
CL Perth engages CL Naka at 6,000 yards
DD Amatsukaze engages DD Fortune at 6,000 yards
DD Amatsukaze engages DD Isis at 6,000 yards
DD Maikaze engages DD Fortune at 6,000 yards
DD Maikaze engages DD Express at 6,000 yards
DD Jupiter engages xAP Kanzyu Maru at 6,000 yards
DD Electra engages xAP Asama Maru at 6,000 yards
DD Maikaze engages DD Nizam at 6,000 yards
DD Amatsukaze engages DD Nestor at 6,000 yards
CA Canberra engages CA Suzuya at 6,000 yards
CA Australia engages CL Naka at 6,000 yards
CL Naka sunk by CL Phoenix at 6,000 yards
CL Abukuma engages CA Australia at 6,000 yards
CL Yura engages CL Hobart at 6,000 yards
DD Amatsukaze engages DD Electra at 6,000 yards
DD Nestor engages DD Isokaze at 6,000 yards
DD Maikaze engages DD Fortune at 6,000 yards
DD Encounter engages DD Maikaze at 6,000 yards
DD Maikaze engages DD Nizam at 6,000 yards
DD Nestor engages DD Isokaze at 6,000 yards
Range increases to 7,000 yards
CL Hobart engages CA Kinugasa at 7,000 yards
CL Perth engages CA Kumano at 7,000 yards
CA Kumano engages CA Australia at 7,000 yards
CL Phoenix engages CA Haguro at 7,000 yards
CL Abukuma engages CL Phoenix at 7,000 yards
CA Kinugasa engages CL Hobart at 7,000 yards
DD Isokaze engages DD Electra at 7,000 yards
DD Maikaze engages DD Isis at 7,000 yards
DD Fortune engages DD Maikaze at 7,000 yards
DD Jupiter engages xAP Manzyu Maru at 7,000 yards
DD Isis engages xAP Kanzyu Maru at 7,000 yards
DD Maikaze engages DD Electra at 7,000 yards
DD Norman engages DD Maikaze at 7,000 yards
DD Amatsukaze engages DD Nizam at 7,000 yards
DD Nestor engages DD Amatsukaze at 7,000 yards
Range increases to 10,000 yards
CA Kinugasa engages CL Perth at 10,000 yards
CA Suzuya engages CA Canberra at 10,000 yards
CL Abukuma engages CA Canberra at 10,000 yards
CL Hobart engages CL Yura at 10,000 yards
CL Yura engages CL Perth at 10,000 yards
DD Jupiter engages DD Amatsukaze at 10,000 yards
DD Maikaze engages DD Electra at 10,000 yards
DD Electra engages AK Sado Maru at 10,000 yards
DD Express engages xAP Manzyu Maru at 10,000 yards
DD Express engages xAP Kanzyu Maru at 10,000 yards
DD Electra engages xAP Asama Maru at 10,000 yards
DD Norman engages DD Amatsukaze at 10,000 yards
DD Nizam engages DD Amatsukaze at 10,000 yards
DD Napier engages DD Isokaze at 10,000 yards
Range increases to 13,000 yards
CA Kinugasa engages CL Perth at 13,000 yards
CA Kumano engages CL Hobart at 13,000 yards
CA Kumano engages CA Australia at 13,000 yards
CL Perth engages CA Haguro at 13,000 yards
CA Suzuya engages CL Honolulu at 13,000 yards
CA Kinugasa engages CL Hobart at 13,000 yards
CL Yura engages CL Perth at 13,000 yards
DD Nestor engages DD Isokaze at 13,000 yards
DD Nestor engages DD Maikaze at 13,000 yards
DD Maikaze engages DD Fortune at 13,000 yards
DD Amatsukaze engages DD Express at 13,000 yards
DD Encounter engages DD Amatsukaze at 13,000 yards
DD Electra engages xAP Asama Maru at 13,000 yards
DD Norman engages DD Amatsukaze at 13,000 yards
DD Nizam engages DD Maikaze at 13,000 yards
DD Maikaze engages DD Napier at 13,000 yards
DD Maikaze engages DD Nestor at 13,000 yards
Range increases to 16,000 yards
BB Prince of Wales engages CA Kinugasa at 16,000 yards
CA Kinugasa engages CA Australia at 16,000 yards
CL Yura engages CL Phoenix at 16,000 yards
CL Abukuma engages CL Honolulu at 16,000 yards
CL Abukuma engages CL Hobart at 16,000 yards
CA Suzuya engages CL Perth at 16,000 yards
DD Amatsukaze engages DD Fortune at 16,000 yards
DD Electra engages xAP Manzyu Maru at 16,000 yards
DD Encounter engages xAP Kanzyu Maru at 16,000 yards
DD Maikaze engages DD Electra at 16,000 yards
DD Amatsukaze engages DD Nizam at 16,000 yards
DD Amatsukaze engages DD Napier at 16,000 yards
Range increases to 17,000 yards
CL Yura engages BB Prince of Wales at 17,000 yards
CA Canberra engages CL Abukuma at 17,000 yards
CL Yura engages CA Australia at 17,000 yards
CA Haguro engages CA Canberra at 17,000 yards
DD Amatsukaze engages DD Norman at 17,000 yards
DD Amatsukaze engages DD Jupiter at 17,000 yards
DD Amatsukaze engages DD Isis at 17,000 yards
BB Prince of Wales engages AK Sado Maru at 17,000 yards
DD Express engages xAP Manzyu Maru at 17,000 yards
DD Maikaze engages DD Encounter at 17,000 yards
DD Electra engages DD Amatsukaze at 17,000 yards
Range increases to 20,000 yards
AK Sado Maru , xAP Manzyu Maru , xAP Kanzyu Maru ,
xAP Asama Maru screened from combat
- escorted by DD Amatsukaze , DD Maikaze
BB Prince of Wales engages CA Kumano at 20,000 yards
CL Abukuma engages CL Phoenix at 20,000 yards
CL Abukuma engages CA Canberra at 20,000 yards
CL Yura engages CL Hobart at 20,000 yards
CA Haguro engages CL Perth at 20,000 yards
CL Abukuma engages DD Nizam at 20,000 yards
Range increases to 22,000 yards
BB Prince of Wales engages CA Suzuya at 22,000 yards
CL Honolulu engages CA Suzuya at 22,000 yards
CL Phoenix engages CA Haguro at 22,000 yards
CL Abukuma engages CL Phoenix at 22,000 yards
CA Haguro engages DD Express at 22,000 yards
xAP Kanzyu Maru sunk by BB Prince of Wales at 22,000 yards
BB Prince of Wales engages xAP Asama Maru at 22,000 yards
Range increases to 24,000 yards
CA Australia engages CA Suzuya at 24,000 yards
CL Phoenix engages CA Haguro at 24,000 yards
CL Honolulu engages CA Kumano at 24,000 yards
CL Hobart engages CL Abukuma at 24,000 yards
CL Perth engages DD Amatsukaze at 24,000 yards
CL Perth engages DD Isokaze at 24,000 yards
CL Phoenix engages DD Maikaze at 24,000 yards
Range increases to 26,000 yards
BB Prince of Wales engages xAP Asama Maru at 26,000 yards
CL Honolulu engages CA Suzuya at 26,000 yards
CL Phoenix engages CA Haguro at 26,000 yards
CL Honolulu engages CA Suzuya at 26,000 yards
Range increases to 29,000 yards
AK Sado Maru , xAP Manzyu Maru , xAP Asama Maru screened from combat
BB Prince of Wales engages CA Haguro at 29,000 yards
BB Prince of Wales engages CA Suzuya at 29,000 yards
Range increases to 30,000 yards
DD Nizam collides with DD Jupiter at 68 , 116
CA Canberra engages CA Kinugasa at 30,000 yards
Task forces break off...


at the end of the turn we get the confirmation that West Virginia and three DDs sink, CA Canberra and another DD are in sinking condition, we will try to save them from sinking in the level 4 port of Koepang...


BB West Virginia sinks at sea
DD Tucker sinks at sea
DD Nestor sinks at sea
DD Case sinks at sea


--------------------------------------------------------------------------------

Ground combat at Malang (55,105)

Japanese Bombardment attack

Attacking force 60825 troops, 701 guns, 132 vehicles, Assault Value = 1834

Defending force 58562 troops, 476 guns, 180 vehicles, Assault Value = 1248

Japanese ground losses:
Guns lost 1 (1 destroyed, 0 disabled)

Allied ground losses:
175 casualties reported
Squads: 0 destroyed, 14 disabled
Non Combat: 0 destroyed, 2 disabled
Engineers: 0 destroyed, 1 disabled

Assaulting units:
1st Raiding Regiment
88th Naval Guard Unit
II/19th Naval Guard Unit
4th Ind Engineer Regiment
67th Naval Guard Unit
33rd Division
III/66th Naval Guard Unit
41st Infantry Regiment
1st Engineer Co
Maizuru 2nd SNLF
46th Naval Guard Unit
Miura Det
6th Indpt SNLF Coy
55th Division
15th Naval Guard Unit
4th Division
91st Naval Guard Unit
1st Ind Engineer Regiment
2nd Sasebo SNLF Coy
1st Indpt SNLF Coy
8th Tank Regiment
10th Garrison Unit
79th Garrison Battalion
II/66th Nav Gd /2
8th RF Gun Battalion
16th Army
5th Mortar Battalion
23rd Medium Field Artillery Regiment
9th RF Gun Battalion
25th Army
41st Field AA Battalion
17th Medium Field Artillery Regiment
36th Field AA Battalion
3rd Mortar Battalion
10th RF Gun Battalion
11th RF Gun Battalion

Defending units:
VI Landstorm Cdo
2nd KNIL Regiment
Tjepoe Cdo
S Borneo KNIL Battalion
III/IV Barisan Cdo
II Landstorm Cdo
I Marechausse Cdo
Lijfwacht Cav Sqdn
3rd Cav Sqdn
III Landstorm Cdo
I Landstorm Cdo
Tjilitjap Cdo
Roodenburg Cdo
Makassar KNIL Cdo
Prajoeda Cdo
1st Cav Regiment
II Marechausse Cdo
6th KNIL Regiment
Mobiele Battalion
4th KNIL Regiment
1st KNIL Regiment
V Landstorm Cdo
W Borneo KNIL Battalion
VII KNIL Battalion
I/II Barisan Cdo
Makassar RK Cdo
Groep Zud
IV Landstorm Cdo
Riouw Cdo
4th Cav Sqdn
6th Cav Sqdn
Marinier Battalion
2/15 Punjab Battalion
A-II-Ld AA Battalion
VLG-I Sup Groep
1st Bombay Construction Battalion
VkA-1 Sup Afd
221 Group Base Force
1st Madras Construction Battalion
VLG-V Sup Groep
HQ I KNIL Division
NI-MLD
HQ II KNIL Division
224 Group Base Force
A-I-Ld AA Battalion
Broome RAN Stn Base Force
ABDA
VLG-II Sup Groep
Hedland RAN Stn Base Force
24th NZ Pioneer Coy
KNI Leger
HQ III KNIL Division
VLG-IV Sup Groep
1st Bengal Construction Battalion
Pathan Construction Battalion
VLG-III Sup Groep
ML-KNIL
VkA-2 Sup Afd
VkA-4 Sup Afd
VkA-3 Sup Afd
A-III-Ld AA Battalion
106th RN Base Force


more SIG INT about Japanese troop movements...


2/77th Infantry Regiment is loaded on xAP Mizuho Maru moving to Tjepoe.
Southern Army is loaded on a Ehime Cargo class xAK moving to Soerabaja.
3/II./4th Infantry Battalion is loaded on a Japanese xAK moving to Malang.


Attachment (1)

< Message edited by castor troy -- 12/3/2021 1:37:47 PM >


_____________________________


(in reply to castor troy)
Post #: 271
RE: AAR 42 - 12/3/2021 1:39:34 PM   
castor troy


Posts: 14330
Joined: 8/23/2004
From: Austria
Status: offline
that's how our ships are looking at the end of the turn, the IJN has pretty much damage 1/3 of our combatants in the area... the loss of BB West Virginia is severe but we got BB Hiei in return and I guess we have also sunk several of the dreaded IJN heavy cruisers...


Attachment (1)

_____________________________


(in reply to castor troy)
Post #: 272
RE: AAR 42 - 12/3/2021 1:41:13 PM   
castor troy


Posts: 14330
Joined: 8/23/2004
From: Austria
Status: offline
air losses on the ground clearly confirm Hiei plus at least two CL/CA being sunk outright, more of them must be in sinking condition...


Attachment (1)

_____________________________


(in reply to castor troy)
Post #: 273
RE: AAR 42 - 12/3/2021 1:47:53 PM   
RangerJoe


Posts: 13450
Joined: 11/16/2015
From: My Mother, although my Father had some small part.
Status: offline
Another nice victory.

_____________________________

Seek peace but keep your gun handy.

I'm not a complete idiot, some parts are missing!

“Illegitemus non carborundum est (“Don’t let the bastards grind you down”).”
― Julia Child


(in reply to castor troy)
Post #: 274
RE: AAR 42 - 12/3/2021 1:52:17 PM   
Nomad


Posts: 5905
Joined: 9/5/2001
From: West Yellowstone, Montana
Status: offline
Wow, huge victory for you.

(in reply to RangerJoe)
Post #: 275
RE: AAR 42 - 12/3/2021 1:53:19 PM   
RangerJoe


Posts: 13450
Joined: 11/16/2015
From: My Mother, although my Father had some small part.
Status: offline
I can see problems with his operational plans but . . .

Enjoy the game.

_____________________________

Seek peace but keep your gun handy.

I'm not a complete idiot, some parts are missing!

“Illegitemus non carborundum est (“Don’t let the bastards grind you down”).”
― Julia Child


(in reply to Nomad)
Post #: 276
RE: AAR 42 - 12/3/2021 2:07:07 PM   
castor troy


Posts: 14330
Joined: 8/23/2004
From: Austria
Status: offline
Mundy has had his carrier bombers flying into land based CAP quite often, taking huge losses. More than once people asked why he wouldn't stand down his bombers when nearing an area where his carrier based bombers would end up in range of airfields and everytime I replied that would be fine with me as it would enable me to send in surface combat TFs.

Yesterday KB didn't launch any bomber strikes and I expected him to have his bombers stood down also today with KB acting as sponge for any air attacks, taking position NW of Koepang. So it enabled me to send in halve of my total Navy to engage his force. Our USN BB TF ended up at Roti, West of Koepang so if he had his bombers on nav strike it could have been bloody. But he could have also lost several hundred bombers against my CAP at Koepang in the last two days and would probably be critisized for having his bombers fly into land based CAP.

I have every operational USN BB/CA/CL plus Force Z and all my carriers in the region and just employed them, also taking considerable damage. He sent in a powerful force but took more losses and most important, this day has decided the battle for Timor so I'd take this as a strategic victory.


Attachment (1)

_____________________________


(in reply to RangerJoe)
Post #: 277
RE: AAR 42 - 12/3/2021 2:33:30 PM   
DesertWolf101


Posts: 1445
Joined: 11/26/2016
Status: offline
It's not, or at least shouldn't be, either send your carrier wings to die or send in your amphib invasions without air protection and I think you know that. If you have such a strong position at Koepang with plenty of land-based air, he should:

1) Be aware that is the case through recon/naval search
2) Neutralize that threat through an air/naval bombardment campaign before charging in

Now you might retort that Japan is in desperate straits and needs to take the risks to capture Koepang and you would be right. But the answer to that is that frankly the game is way past salvaging for Japan and the reason Japan is in such dire straits to begin with is because of the numerous bad decisions that we have seen being taken from the start of this game.

(in reply to castor troy)
Post #: 278
RE: AAR 42 - 12/3/2021 2:41:42 PM   
castor troy


Posts: 14330
Joined: 8/23/2004
From: Austria
Status: offline
quote:

ORIGINAL: DesertWolf101

It's not, or at least shouldn't be, either send your carrier wings to die or send in your amphib invasions without air protection and I think you know that. If you have such a strong position at Koepang with plenty of land-based air, he should:

1) Be aware that is the case through recon/naval search
2) Neutralize that threat through an air/naval bombardment campaign before charging in

Now you might retort that Japan is in desperate straits and needs to take the risks to capture Koepang and you would be right. But the answer to that is that frankly the game is way past salvaging for Japan and the reason Japan is in such dire straits to begin with is because of the numerous bad decisions that we have seen being taken from the start of this game.


I'd say 1) plus the decision it's too late and there is no chance to take Timor.

The area North of Darwin has been turned into a triangle of Death with built up bases that have been heavily reinforced plus the fact that literally my whole Navy is in the area. Same goes for most of the airforce and lots of troops that could be brought as reinforcements if the Japanese would manage to land considerable force somewhere. Bombarding Koepang would lead to his ships running into Force Z plus the whole USN and big parts of the RN. Air offensive is out of scope too IMO, he would face several hundred Warhawks with 70/70 pilots that would drain his air offensive. I could add in my P-38 flying circus which I haven't even employed yet with 50 replacement P-38 in the pool.

Mundy is aware that I have built up several bases (at least there was recon so he should be aware) and Timor is the next step from Java but what he isn't aware is that Darwin has been the biggest Naval port in history over the last months with my Navy waiting to strike. I would have been willing to fight the decisive battle the Japanese always dreamt of but then Mundy would have had to bring everything. I did.

< Message edited by castor troy -- 12/3/2021 2:48:41 PM >


_____________________________


(in reply to DesertWolf101)
Post #: 279
RE: AAR 42 - 12/3/2021 2:43:59 PM   
RangerJoe


Posts: 13450
Joined: 11/16/2015
From: My Mother, although my Father had some small part.
Status: offline
Why use a little hammer when you have a big one?

Go big or stay home . . .

_____________________________

Seek peace but keep your gun handy.

I'm not a complete idiot, some parts are missing!

“Illegitemus non carborundum est (“Don’t let the bastards grind you down”).”
― Julia Child


(in reply to castor troy)
Post #: 280
RE: AAR 42 - 12/3/2021 2:46:04 PM   
castor troy


Posts: 14330
Joined: 8/23/2004
From: Austria
Status: offline
quote:

ORIGINAL: RangerJoe

Why use a little hammer when you have a big one?

Go big or stay home . . .


Because that's what 3/4 of the players do.

I hardly see people using all their assets in one place, they preferre going wild on the whole map at the same time. I'm one of those of your second thesis.

Mundy could take the whole Central Pacific, the North Pacific, Ceylon for example. He would face pretty much no opposition other than islands defended by ground units. I decided on defending North of Darwin, so he is facing pretty much everything I have there.

edit: he has to clear the last stand on Java but then has to turtle up in the SRA, if he decides to continue an offensive into the area Koepang, Kendari, Manado, then the war will most likely be decided in 42 and I would be really surprised if the Japanese could survive this. These bases have level 8/9 airfields, masses of troops, forts, my Navy, airforce and last not least 600+ carrier based aircraft (as soon as Wasp joins the fleet there) that haven't been in action yet but once striking a convoy long ago.

< Message edited by castor troy -- 12/3/2021 2:53:31 PM >


_____________________________


(in reply to RangerJoe)
Post #: 281
RE: AAR 42 - 12/3/2021 2:57:02 PM   
DesertWolf101


Posts: 1445
Joined: 11/26/2016
Status: offline

quote:

ORIGINAL: castor troy

quote:

ORIGINAL: DesertWolf101

It's not, or at least shouldn't be, either send your carrier wings to die or send in your amphib invasions without air protection and I think you know that. If you have such a strong position at Koepang with plenty of land-based air, he should:

1) Be aware that is the case through recon/naval search
2) Neutralize that threat through an air/naval bombardment campaign before charging in

Now you might retort that Japan is in desperate straits and needs to take the risks to capture Koepang and you would be right. But the answer to that is that frankly the game is way past salvaging for Japan and the reason Japan is in such dire straits to begin with is because of the numerous bad decisions that we have seen being taken from the start of this game.


I'd say 1) plus the decision it's too late and there is no chance to take Timor.

The area North of Darwin has been turned into a triangle of Death with built up bases that have been heavily reinforced plus the fact that literally my whole Navy is in the area. Same goes for most of the airforce and lots of troops that could be brought as reinforcements if the Japanese would manage to land considerable force somewhere. Bombarding Koepang would lead to his ships running into Force Z plus the whole USN and big parts of the RN. Air offensive is out of scope too IMO, he would face several hundred Warhawks with 70/70 pilots that would drain his air offensive. I could add in my P-38 flying circus which I haven't even employed yet with 50 replacement P-38 in the pool.

Mundy is aware that I have built up several bases (at least there was recon so he should be aware) and Timor is the next step from Java but what he isn't aware is that Darwin has been the biggest Naval port in history over the last months with my Navy waiting to strike. I would have been willing to fight the decisive battle the Japanese always dreamt of but then Mundy would have had to bring everything. I did.


If Mundy is aware that you have such a strong position that can't even be reduced by a preparatory campaign, then it is an even bigger mistake to send in vulnerable divisions of troops to their death. Either he knows the position is too well defended and he still went in or he didn't know that is the case and he should have swept and naval bombed to find out before sending in the invasion. Honestly, better yet to recognize the truth that this game is lost and just starts defending if he decides to continue with the seal clubbing adventure.

(in reply to castor troy)
Post #: 282
RE: AAR 42 - 12/3/2021 3:07:04 PM   
castor troy


Posts: 14330
Joined: 8/23/2004
From: Austria
Status: offline
quote:

ORIGINAL: DesertWolf101


quote:

ORIGINAL: castor troy

quote:

ORIGINAL: DesertWolf101

It's not, or at least shouldn't be, either send your carrier wings to die or send in your amphib invasions without air protection and I think you know that. If you have such a strong position at Koepang with plenty of land-based air, he should:

1) Be aware that is the case through recon/naval search
2) Neutralize that threat through an air/naval bombardment campaign before charging in

Now you might retort that Japan is in desperate straits and needs to take the risks to capture Koepang and you would be right. But the answer to that is that frankly the game is way past salvaging for Japan and the reason Japan is in such dire straits to begin with is because of the numerous bad decisions that we have seen being taken from the start of this game.


I'd say 1) plus the decision it's too late and there is no chance to take Timor.

The area North of Darwin has been turned into a triangle of Death with built up bases that have been heavily reinforced plus the fact that literally my whole Navy is in the area. Same goes for most of the airforce and lots of troops that could be brought as reinforcements if the Japanese would manage to land considerable force somewhere. Bombarding Koepang would lead to his ships running into Force Z plus the whole USN and big parts of the RN. Air offensive is out of scope too IMO, he would face several hundred Warhawks with 70/70 pilots that would drain his air offensive. I could add in my P-38 flying circus which I haven't even employed yet with 50 replacement P-38 in the pool.

Mundy is aware that I have built up several bases (at least there was recon so he should be aware) and Timor is the next step from Java but what he isn't aware is that Darwin has been the biggest Naval port in history over the last months with my Navy waiting to strike. I would have been willing to fight the decisive battle the Japanese always dreamt of but then Mundy would have had to bring everything. I did.


If Mundy is aware that you have such a strong position that can't even be reduced by a preparatory campaign, then it is an even bigger mistake to send in vulnerable divisions of troops to their death. Either he knows the position is too well defended and he still went in or he didn't know that is the case and he should have swept and naval bombed to find out before sending in the invasion. Honestly, better yet to recognize the truth that this game is lost and just starts defending if he decides to continue with the seal clubbing adventure.


Mundy's recon most likely showed him this. 16 units, 50,000 men. port 3, airfield 6. Aircraft, well, two dozen fighters, some naval search.

What his recon couldn't show him, because recon is no time machine, is this: 16 units, 50,000 men. Force Z, the whole USN and 500 aircraft in the area outside of his recon range. It's pretty much the same when the Japanese run into Force Z at Kendari mid Dec 41 and got their head handed over wondering where this Force came from. Like I've said, Mundy is attacking into the worst possible area and even after this day I'm not sure he is fully aware of it as he hasn't got a clear picture on my setup there.

I see other of his moves in the past way worse as these caused more avoidable losses in ships. I guess my carriers could even go toe on toe with KB and win at this point. And by winning I mean big time, not a 1:1 in losses in the end. Yes, all my carriers are in one basket, sporting some 550 carrier based ac.

< Message edited by castor troy -- 12/3/2021 3:13:35 PM >


_____________________________


(in reply to DesertWolf101)
Post #: 283
RE: AAR 42 - 12/3/2021 3:12:23 PM   
DesertWolf101


Posts: 1445
Joined: 11/26/2016
Status: offline

quote:

ORIGINAL: castor troy


quote:

ORIGINAL: DesertWolf101


quote:

ORIGINAL: castor troy

quote:

ORIGINAL: DesertWolf101

It's not, or at least shouldn't be, either send your carrier wings to die or send in your amphib invasions without air protection and I think you know that. If you have such a strong position at Koepang with plenty of land-based air, he should:

1) Be aware that is the case through recon/naval search
2) Neutralize that threat through an air/naval bombardment campaign before charging in

Now you might retort that Japan is in desperate straits and needs to take the risks to capture Koepang and you would be right. But the answer to that is that frankly the game is way past salvaging for Japan and the reason Japan is in such dire straits to begin with is because of the numerous bad decisions that we have seen being taken from the start of this game.


I'd say 1) plus the decision it's too late and there is no chance to take Timor.

The area North of Darwin has been turned into a triangle of Death with built up bases that have been heavily reinforced plus the fact that literally my whole Navy is in the area. Same goes for most of the airforce and lots of troops that could be brought as reinforcements if the Japanese would manage to land considerable force somewhere. Bombarding Koepang would lead to his ships running into Force Z plus the whole USN and big parts of the RN. Air offensive is out of scope too IMO, he would face several hundred Warhawks with 70/70 pilots that would drain his air offensive. I could add in my P-38 flying circus which I haven't even employed yet with 50 replacement P-38 in the pool.

Mundy is aware that I have built up several bases (at least there was recon so he should be aware) and Timor is the next step from Java but what he isn't aware is that Darwin has been the biggest Naval port in history over the last months with my Navy waiting to strike. I would have been willing to fight the decisive battle the Japanese always dreamt of but then Mundy would have had to bring everything. I did.


If Mundy is aware that you have such a strong position that can't even be reduced by a preparatory campaign, then it is an even bigger mistake to send in vulnerable divisions of troops to their death. Either he knows the position is too well defended and he still went in or he didn't know that is the case and he should have swept and naval bombed to find out before sending in the invasion. Honestly, better yet to recognize the truth that this game is lost and just starts defending if he decides to continue with the seal clubbing adventure.


Mundy's recon most likely showed him this. 16 units, 50,000 men. port 3, airfield 6. Aircraft, well, two dozen fighters, some naval search.

What his recon couldn't show him, because recon is no time machine, is this: 16 units, 50,000 men. Force Z, the whole USN and 500 aircraft in the area outside of his recon range.


Not to belabor the point, and I think at this stage we are starting to get to the agree to disagree stage, I will make one final comment.

If that is what recon showed him, then why did he stand down KB's strike wings? If he was in the least bit suspicious that you may surge aircraft in then he should have bombarded and bombed the airfields to prevent you from using land based air. If you have CV superiority, then he should have never invaded to begin with.

(in reply to castor troy)
Post #: 284
RE: AAR 42 - 12/3/2021 3:19:52 PM   
castor troy


Posts: 14330
Joined: 8/23/2004
From: Austria
Status: offline
quote:

ORIGINAL: DesertWolf101


quote:

ORIGINAL: castor troy


quote:

ORIGINAL: DesertWolf101


quote:

ORIGINAL: castor troy

quote:

ORIGINAL: DesertWolf101

It's not, or at least shouldn't be, either send your carrier wings to die or send in your amphib invasions without air protection and I think you know that. If you have such a strong position at Koepang with plenty of land-based air, he should:

1) Be aware that is the case through recon/naval search
2) Neutralize that threat through an air/naval bombardment campaign before charging in

Now you might retort that Japan is in desperate straits and needs to take the risks to capture Koepang and you would be right. But the answer to that is that frankly the game is way past salvaging for Japan and the reason Japan is in such dire straits to begin with is because of the numerous bad decisions that we have seen being taken from the start of this game.


I'd say 1) plus the decision it's too late and there is no chance to take Timor.

The area North of Darwin has been turned into a triangle of Death with built up bases that have been heavily reinforced plus the fact that literally my whole Navy is in the area. Same goes for most of the airforce and lots of troops that could be brought as reinforcements if the Japanese would manage to land considerable force somewhere. Bombarding Koepang would lead to his ships running into Force Z plus the whole USN and big parts of the RN. Air offensive is out of scope too IMO, he would face several hundred Warhawks with 70/70 pilots that would drain his air offensive. I could add in my P-38 flying circus which I haven't even employed yet with 50 replacement P-38 in the pool.

Mundy is aware that I have built up several bases (at least there was recon so he should be aware) and Timor is the next step from Java but what he isn't aware is that Darwin has been the biggest Naval port in history over the last months with my Navy waiting to strike. I would have been willing to fight the decisive battle the Japanese always dreamt of but then Mundy would have had to bring everything. I did.


If Mundy is aware that you have such a strong position that can't even be reduced by a preparatory campaign, then it is an even bigger mistake to send in vulnerable divisions of troops to their death. Either he knows the position is too well defended and he still went in or he didn't know that is the case and he should have swept and naval bombed to find out before sending in the invasion. Honestly, better yet to recognize the truth that this game is lost and just starts defending if he decides to continue with the seal clubbing adventure.


Mundy's recon most likely showed him this. 16 units, 50,000 men. port 3, airfield 6. Aircraft, well, two dozen fighters, some naval search.

What his recon couldn't show him, because recon is no time machine, is this: 16 units, 50,000 men. Force Z, the whole USN and 500 aircraft in the area outside of his recon range.


Not to belabor the point, and I think at this stage we are starting to get to the agree to disagree stage, I will make one final comment.

If that is what recon showed him, then why did he stand down KB's strike wings? If he was in the least bit suspicious that you may surge aircraft in then he should have bombarded and bombed the airfields to prevent you from using land based air. If you have CV superiority, then he should have never invaded to begin with.


Easily explained and I did so before. Because he had to make the experience (more than once) that his bomber groups (both his Japanese and Allied earlier) were decimated by CAP that is suddenly plopping up. And everytime someone smarter said "why on Earth doesn't he stand down his bombers when going close to land bases?".

If I do nothing, he can bomb the airfield. If I do nothing, he can naval bombard the airfield. If I do something, he takes losses. It's not like Mundy is the first player to lose several hundred aircraft a day to a CAP trap. And I'm surely not the one who invented the CAP trap. Even if he had 4Es he wouldn't close the airfield in one day, have fun sending in the bombers again on day two. Or a bombardment TF (if spotted) with a Navy close by twice the size than the whole IJN.

It's the usual cat and mouse play. Just to make myself clear, I can't see a brilliant move of mine here or something like that. It was just the usual numbers game and I was amazed to see the enemy task force inflicting such losses on my superior forces. And no, I wouldn't rate a TF with a BB, halve a dozen cruisers and destroyers "weak" either. Just as I wouldn't rate Force Z without Repulse "weak".

Oh, forgot on the CV superiority comment. What would he do then, when he doesn't know where my carriers are. If you don't know where KB is, do you keep all your ships in port as it could pop up anywhere on the map? Allied players use their four starting carriers all over the map non stop according to most AARs no matter if KB has been spotted or not. Results are of course often frustrating all out of a sudden 
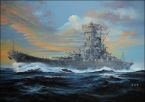
Goes for both sides of course.

< Message edited by castor troy -- 12/3/2021 3:27:15 PM >


_____________________________


(in reply to DesertWolf101)
Post #: 285
RE: AAR 42 - 12/3/2021 3:32:23 PM   
castor troy


Posts: 14330
Joined: 8/23/2004
From: Austria
Status: offline
AFTER ACTION REPORTS FOR May 09, 42
--------------------------------------------------------------------------------
ASW attack near Donggala at 69,96

Japanese Ships
DD Murasame
AMC Bankok Maru
AMC Nosiro Maru
AMC Awata Maru
LSD Akitsu Maru
AK Sakito Maru
xAP Ukishima Maru
xAP Keihuku Maru
xAK Norfolk Maru
xAK Toyooka Maru
xAK Lyons Maru
xAK Teiyo Maru
DD Hatsuharu
DD Harusame

Allied Ships
SS KVII

looks like a big troop convoy passing South of Borneo...


SS KVII is sighted by escort
KVII diving deep ....
DD Hatsuharu fails to find sub and abandons search
DD Harusame attacking submerged sub ....
DD Harusame fails to find sub, continues to search...
Escort abandons search for sub


--------------------------------------------------------------------------------
Submarine attack near Koepang at 67,115


Japanese Ships
CA Suzuya, Torpedo hits 1

Allied Ships
SS KXVI

Suzuya takes a torpedo but shows no further damage... looks like the remaining Japanese ships are fleeing towards Java...


CA Suzuya is sighted by SS KXVI
SS KXVI launches 4 torpedoes


Attachment (1)

_____________________________


(in reply to castor troy)
Post #: 286
RE: AAR 42 - 12/3/2021 3:45:57 PM   
castor troy


Posts: 14330
Joined: 8/23/2004
From: Austria
Status: offline

--------------------------------------------------------------------------------
ASW attack near Mussau Island at 104,120

Japanese Ships
AO Toei Maru
DD Matsukaze

Allied Ships
SS S-34


more fuel was going to Rabaul...


SS S-34 is sighted by escort
S-34 diving deep ....
DD Matsukaze fails to find sub, continues to search...
Escort abandons search for sub


--------------------------------------------------------------------------------
Morning Air attack on TF, near Koepang at 68,116


Weather in hex: Thunderstorms

Raid detected at 119 NM, estimated altitude 12,000 feet.
Estimated time to target is 44 minutes

Japanese aircraft
A6M2 Zero x 39
B5M1 Mabel x 18
B5N1 Kate x 39
B5N2 Kate x 39
D3A1 Val x 51

Allied aircraft
Buffalo I x 14
Hurricane IIb Trop x 14
B-339D x 11
P-40E Warhawk x 11
Kittyhawk IA x 14
P-39D Airacobra x 22
P-40E Warhawk x 137

Japanese aircraft losses
A6M2 Zero: 3 destroyed
B5M1 Mabel: 1 destroyed by flak
B5N1 Kate: 3 destroyed, 2 damaged
B5N1 Kate: 2 destroyed by flak
B5N2 Kate: 8 destroyed, 3 damaged
B5N2 Kate: 1 destroyed by flak
D3A1 Val: 7 destroyed, 17 damaged
D3A1 Val: 2 destroyed by flak

No Allied losses

Allied Ships
CL Danae
AGP Aldebaran, Torpedo hits 1, and is sunk
xAKL Meroendoeng, Bomb hits 1, heavy fires, heavy damage
AMc MMS C, Torpedo hits 1, and is sunk
BB Maryland, Bomb hits 2
CL Hobart
BB Prince of Wales, Bomb hits 1
AGP Wega, Torpedo hits 3, and is sunk
AG Canopus, Torpedo hits 1, and is sunk
AG Deneb, Torpedo hits 1, and is sunk
xAKL Silindoeng, Bomb hits 1, heavy fires
xAKL Luzon
AMc MMS A, Torpedo hits 1, and is sunk
CL Honolulu
CL Glasgow
MMS-94, Torpedo hits 1, and is sunk
MMS-52
CL Mauritius
xAKL Lematang, Bomb hits 2, heavy fires, heavy damage
AMc Ciska, Torpedo hits 1, and is sunk
MMS-125


and here we go... guess that's what you asked for but I think it has not been doing him good as the KB launches a strike directly against Koepang where I still had Force Z and other strong surface assets (damaged ships were disbanded for emergency repairs)... around 250 ABDA/USAAF fighters were covering the fleet and with maximum radar detection we get over 200 airborne which is pretty bad news for the IJNAF... it's been a long tangle vs the Zeroes but then the fighters got through to the bombers until... suddenly... the attacks on the bombers stopped... was amazed to see that many bombers attacking our ships but Thunderstorms meant the torpedo bombers are pretty much useless and the Vals with their tiny bombs are only a real threat to anything smaller than a heavy cruiser if hit by more than one or two... don't be fooled by the combat report and all those smaller ships that have been attacked, most of the bomber strikes were aimed at the warships with horrible hit rates...

about 50 bombers of this strike were shot down... guess that's a full KB alpha strike at the moment...


Aircraft Attacking:
8 x D3A1 Val releasing from 2000'
Naval Attack: 1 x 250 kg SAP Bomb
7 x B5N1 Kate launching torpedoes at 200 feet
Naval Attack: 1 x 45cm Type 91 Torp
6 x D3A1 Val releasing from 1000'
Naval Attack: 1 x 250 kg SAP Bomb
9 x B5M1 Mabel bombing from 9000 feet
Naval Attack: 2 x 250 kg SAP Bomb
8 x B5M1 Mabel launching torpedoes at 200 feet
Naval Attack: 1 x 45cm Type 91 Torp
6 x D3A1 Val releasing from 3000'
Naval Attack: 1 x 250 kg SAP Bomb
8 x B5N2 Kate launching torpedoes at 200 feet
Naval Attack: 1 x 45cm Type 91 Torp
2 x D3A1 Val releasing from 1000'
Naval Attack: 1 x 250 kg SAP Bomb
19 x B5N1 Kate launching torpedoes at 200 feet
Naval Attack: 1 x 45cm Type 91 Torp
6 x B5N2 Kate launching torpedoes at 200 feet
Naval Attack: 1 x 45cm Type 91 Torp
1 x D3A1 Val releasing from 3000'
Naval Attack: 1 x 250 kg SAP Bomb
3 x B5N2 Kate launching torpedoes at 200 feet
Naval Attack: 1 x 45cm Type 91 Torp
6 x B5N2 Kate launching torpedoes at 200 feet
Naval Attack: 1 x 45cm Type 91 Torp
1 x D3A1 Val releasing from 3000'
Naval Attack: 1 x 250 kg SAP Bomb
1 x D3A1 Val releasing from 2000'
Naval Attack: 1 x 250 kg SAP Bomb
1 x D3A1 Val releasing from 2000'
Naval Attack: 1 x 250 kg SAP Bomb
5 x D3A1 Val releasing from 2000'
Naval Attack: 1 x 250 kg SAP Bomb
4 x D3A1 Val releasing from 1000'
Naval Attack: 1 x 250 kg SAP Bomb
4 x D3A1 Val releasing from 3000'
Naval Attack: 1 x 250 kg SAP Bomb

CAP engaged:
1-Vl.G.IV with P-40E Warhawk (0 airborne, 8 on standby, 0 scrambling)
3 plane(s) not yet engaged, 0 being recalled, 0 out of immediate contact.
Group patrol altitude is 20000 , scrambling fighters between 9000 and 20000.
Time for all group planes to reach interception is 28 minutes
3 planes vectored on to bombers
2-VI.G.V with B-339D (0 airborne, 8 on standby, 0 scrambling)
3 plane(s) not yet engaged, 0 being recalled, 0 out of immediate contact.
Group patrol altitude is 10000
Time for all group planes to reach interception is 27 minutes
No.75 Sqn RAAF with Kittyhawk IA (0 airborne, 10 on standby, 0 scrambling)
4 plane(s) not yet engaged, 0 being recalled, 0 out of immediate contact.
Group patrol altitude is 20000 , scrambling fighters between 10000 and 20000.
Time for all group planes to reach interception is 31 minutes
6 planes vectored on to bombers
No.243 Sqn RAF with Hurricane IIb Trop (0 airborne, 10 on standby, 0 scrambling)
4 plane(s) not yet engaged, 0 being recalled, 0 out of immediate contact.
Group patrol altitude is 15000 , scrambling fighters between 11000 and 13000.
Time for all group planes to reach interception is 26 minutes
10 planes vectored on to bombers
No.14 Sqn RNZAF with Buffalo I (0 airborne, 10 on standby, 0 scrambling)
4 plane(s) not yet engaged, 0 being recalled, 0 out of immediate contact.
Group patrol altitude is 10000 , scrambling fighters between 14000 and 15000.
Time for all group planes to reach interception is 31 minutes
14 planes vectored on to bombers
24th PG/3rd PS with P-40E Warhawk (4 airborne, 16 on standby, 0 scrambling)
4 plane(s) intercepting now.
3 plane(s) not yet engaged, 0 being recalled, 0 out of immediate contact.
Group patrol altitude is 15000 , scrambling fighters between 6000 and 15000.
Time for all group planes to reach interception is 30 minutes
7 planes vectored on to bombers
24th PG/17th PS with P-40E Warhawk (4 airborne, 16 on standby, 0 scrambling)
4 plane(s) intercepting now.
3 plane(s) not yet engaged, 0 being recalled, 0 out of immediate contact.
Group patrol altitude is 20000 , scrambling fighters between 11000 and 20000.
Time for all group planes to reach interception is 23 minutes
7 planes vectored on to bombers
24th PG/20th PS with P-40E Warhawk (4 airborne, 16 on standby, 0 scrambling)
4 plane(s) intercepting now.
3 plane(s) not yet engaged, 0 being recalled, 0 out of immediate contact.
Group patrol altitude is 15000 , scrambling fighters between 2000 and 15000.
Time for all group planes to reach interception is 25 minutes
11 planes vectored on to bombers
21st PS with P-40E Warhawk (4 airborne, 16 on standby, 0 scrambling)
4 plane(s) intercepting now.
3 plane(s) not yet engaged, 0 being recalled, 0 out of immediate contact.
Group patrol altitude is 10000 , scrambling fighters between 7000 and 17000.
Time for all group planes to reach interception is 27 minutes
15 planes vectored on to bombers
51st PG/26th PS with P-40E Warhawk (4 airborne, 15 on standby, 0 scrambling)
4 plane(s) intercepting now.
3 plane(s) not yet engaged, 0 being recalled, 0 out of immediate contact.
Group patrol altitude is 15000 , scrambling fighters between 9000 and 15000.
Time for all group planes to reach interception is 23 minutes
11 planes vectored on to bombers
35th PG/41st PS with P-39D Airacobra (4 airborne, 15 on standby, 0 scrambling)
4 plane(s) intercepting now.
3 plane(s) not yet engaged, 0 being recalled, 0 out of immediate contact.
Group patrol altitude is 20000 , scrambling fighters between 8000 and 20000.
Time for all group planes to reach interception is 32 minutes
18 planes vectored on to bombers
35th PG/70th PS with P-40E Warhawk (4 airborne, 16 on standby, 0 scrambling)
4 plane(s) intercepting now.
3 plane(s) not yet engaged, 0 being recalled, 0 out of immediate contact.
Group patrol altitude is 20000 , scrambling fighters between 8000 and 20000.
Time for all group planes to reach interception is 17 minutes
4 planes vectored on to bombers

Heavy smoke from fires obscuring xAKL Meroendoeng
MMS C dead in the water ...
MMS A dead in the water ...
Heavy smoke from fires obscuring xAKL Silindoeng
Ciska dead in the water ...


--------------------------------------------------------------------------------
Afternoon Air attack on TF, near Koepang at 68,116

Weather in hex: Heavy cloud

Raid detected at 118 NM, estimated altitude 13,000 feet.
Estimated time to target is 44 minutes

Japanese aircraft
A6M2 Zero x 32
B5M1 Mabel x 17
B5N1 Kate x 20
B5N2 Kate x 22
D3A1 Val x 45

Allied aircraft
Buffalo I x 14
Hurricane IIb Trop x 14
B-339D x 11
P-40E Warhawk x 8
Kittyhawk IA x 14
P-39D Airacobra x 22
P-40E Warhawk x 122

Japanese aircraft losses
A6M2 Zero: 3 destroyed
B5M1 Mabel: 11 destroyed
B5N1 Kate: 5 destroyed
B5N2 Kate: 6 destroyed, 4 damaged
B5N2 Kate: 1 destroyed by flak
D3A1 Val: 22 destroyed, 5 damaged
D3A1 Val: 1 destroyed by flak

Allied aircraft losses
Buffalo I: 1 destroyed

Allied Ships
CL Hobart
xAKL Sinabang
AMc Lawoe, Torpedo hits 1, and is sunk
BB Prince of Wales
MMS-125
xAKL De Haan
BB Maryland, Bomb hits 4
AMc Salak, Torpedo hits 1, and is sunk
AMc MMS B


after mauling a third of KB's bombers in the morning the enemy commander is not able to stop the afternoon strike and KB launches again, this time in better weather but also against determined opposition that downs dozens and dozens of bombers... Maryland takes a ton of bombs that only do minor damage bouncing off here decks or belt...


Aircraft Attacking:
1 x D3A1 Val releasing from 10000'
Naval Attack: 1 x 250 kg SAP Bomb
5 x B5N1 Kate launching torpedoes at 200 feet
Naval Attack: 1 x 45cm Type 91 Torp
6 x B5M1 Mabel launching torpedoes at 200 feet
Naval Attack: 1 x 45cm Type 91 Torp
2 x D3A1 Val releasing from 2000'
Naval Attack: 1 x 250 kg SAP Bomb
10 x B5N2 Kate launching torpedoes at 200 feet
Naval Attack: 1 x 45cm Type 91 Torp
2 x D3A1 Val releasing from 2000'
Naval Attack: 1 x 250 kg SAP Bomb
1 x D3A1 Val releasing from 1000'
Naval Attack: 1 x 250 kg SAP Bomb
2 x B5N2 Kate launching torpedoes at 200 feet
Naval Attack: 1 x 45cm Type 91 Torp
3 x D3A1 Val releasing from 1000'
Naval Attack: 1 x 250 kg SAP Bomb
4 x D3A1 Val releasing from 2000'
Naval Attack: 1 x 250 kg SAP Bomb
4 x D3A1 Val releasing from 3000'
Naval Attack: 1 x 250 kg SAP Bomb

CAP engaged:
1-Vl.G.IV with P-40E Warhawk (0 airborne, 6 on standby, 0 scrambling)
2 plane(s) not yet engaged, 0 being recalled, 0 out of immediate contact.
Group patrol altitude is 20000 , scrambling fighters to 9000.
Time for all group planes to reach interception is 22 minutes
6 planes vectored on to bombers
2-VI.G.V with B-339D (0 airborne, 8 on standby, 0 scrambling)
3 plane(s) not yet engaged, 0 being recalled, 0 out of immediate contact.
Group patrol altitude is 10000 , scrambling fighters between 9000 and 10000.
Time for all group planes to reach interception is 10 minutes
11 planes vectored on to bombers
No.75 Sqn RAAF with Kittyhawk IA (0 airborne, 10 on standby, 0 scrambling)
4 plane(s) not yet engaged, 0 being recalled, 0 out of immediate contact.
Group patrol altitude is 20000 , scrambling fighters between 10000 and 14000.
Time for all group planes to reach interception is 27 minutes
12 planes vectored on to bombers
No.243 Sqn RAF with Hurricane IIb Trop (0 airborne, 10 on standby, 0 scrambling)
4 plane(s) not yet engaged, 0 being recalled, 0 out of immediate contact.
Group patrol altitude is 15000 , scrambling fighters between 5000 and 15000.
Time for all group planes to reach interception is 24 minutes
10 planes vectored on to bombers
No.14 Sqn RNZAF with Buffalo I (0 airborne, 10 on standby, 0 scrambling)
4 plane(s) not yet engaged, 0 being recalled, 0 out of immediate contact.
Group patrol altitude is 10000 , scrambling fighters between 11000 and 15000.
Time for all group planes to reach interception is 23 minutes
10 planes vectored on to bombers
24th PG/3rd PS with P-40E Warhawk (4 airborne, 14 on standby, 0 scrambling)
4 plane(s) intercepting now.
2 plane(s) not yet engaged, 0 being recalled, 0 out of immediate contact.
Group patrol altitude is 15000 , scrambling fighters between 6000 and 15000.
Time for all group planes to reach interception is 27 minutes
12 planes vectored on to bombers
24th PG/17th PS with P-40E Warhawk (4 airborne, 15 on standby, 0 scrambling)
4 plane(s) intercepting now.
3 plane(s) not yet engaged, 0 being recalled, 0 out of immediate contact.
Group patrol altitude is 20000 , scrambling fighters between 10000 and 20000.
Time for all group planes to reach interception is 29 minutes
18 planes vectored on to bombers
24th PG/20th PS with P-40E Warhawk (4 airborne, 15 on standby, 0 scrambling)
4 plane(s) intercepting now.
3 plane(s) not yet engaged, 0 being recalled, 0 out of immediate contact.
Group patrol altitude is 15000 , scrambling fighters between 8000 and 15000.
Time for all group planes to reach interception is 22 minutes
19 planes vectored on to bombers
21st PS with P-40E Warhawk (4 airborne, 14 on standby, 0 scrambling)
4 plane(s) intercepting now.
2 plane(s) not yet engaged, 0 being recalled, 0 out of immediate contact.
Group patrol altitude is 10000 , scrambling fighters between 5000 and 11000.
Time for all group planes to reach interception is 23 minutes
20 planes vectored on to bombers
51st PG/26th PS with P-40E Warhawk (4 airborne, 14 on standby, 0 scrambling)
4 plane(s) intercepting now.
2 plane(s) not yet engaged, 0 being recalled, 0 out of immediate contact.
Group patrol altitude is 15000 , scrambling fighters between 11000 and 15000.
Time for all group planes to reach interception is 32 minutes
6 planes vectored on to bombers
35th PG/41st PS with P-39D Airacobra (4 airborne, 15 on standby, 0 scrambling)
4 plane(s) intercepting now.
3 plane(s) not yet engaged, 0 being recalled, 0 out of immediate contact.
Group patrol altitude is 20000 , scrambling fighters between 8000 and 20000.
Time for all group planes to reach interception is 30 minutes
11 planes vectored on to bombers
35th PG/70th PS with P-40E Warhawk (4 airborne, 12 on standby, 0 scrambling)
4 plane(s) intercepting now.
2 plane(s) not yet engaged, 0 being recalled, 0 out of immediate contact.
Group patrol altitude is 20000 , scrambling fighters between 10000 and 20000.
Time for all group planes to reach interception is 20 minutes

Lawoe dead in the water ...
Salak dead in the water ...
MMS B dead in the water ...


--------------------------------------------------------------------------------
Sub attack near Mussau Island at 104,120

Japanese Ships
DD Kisaragi
TK Nisshin Maru
DD Matsukaze

Allied Ships
SS S-34


S-34 tangles another time with that tanker convoy but gets no positiv result...


SS S-34 launches 4 torpedoes at DD Kisaragi
DD Matsukaze fails to find sub, continues to search...
DD Matsukaze attacking submerged sub ....
DD Matsukaze is out of ASW ammo
DD Matsukaze fails to find sub, continues to search...
Escort abandons search for sub


--------------------------------------------------------------------------------

Ground combat at Malang (55,105)

Japanese Bombardment attack

Attacking force 61183 troops, 701 guns, 132 vehicles, Assault Value = 1872

Defending force 58564 troops, 476 guns, 180 vehicles, Assault Value = 1249

Japanese ground losses:
19 casualties reported
Squads: 0 destroyed, 4 disabled
Non Combat: 0 destroyed, 0 disabled
Engineers: 0 destroyed, 0 disabled

Allied ground losses:
72 casualties reported
Squads: 1 destroyed, 13 disabled
Non Combat: 0 destroyed, 3 disabled
Engineers: 0 destroyed, 1 disabled

Assaulting units:
1st Engineer Co
8th Tank Regiment
79th Garrison Battalion
33rd Division
10th Garrison Unit
1st Ind Engineer Regiment
4th Division
55th Division
41st Infantry Regiment
2nd Sasebo SNLF Coy
46th Naval Guard Unit
1st Indpt SNLF Coy
II/19th Naval Guard Unit
4th Ind Engineer Regiment
88th Naval Guard Unit
67th Naval Guard Unit
91st Naval Guard Unit
Maizuru 2nd SNLF
15th Naval Guard Unit
1st Raiding Regiment
Miura Det
III/66th Naval Guard Unit
6th Indpt SNLF Coy
II/66th Nav Gd /2
10th RF Gun Battalion
23rd Medium Field Artillery Regiment
8th RF Gun Battalion
41st Field AA Battalion
3rd Mortar Battalion
25th Army
5th Mortar Battalion
36th Field AA Battalion
16th Army
9th RF Gun Battalion
17th Medium Field Artillery Regiment
11th RF Gun Battalion

Defending units:
S Borneo KNIL Battalion
Tjilitjap Cdo
Prajoeda Cdo
V Landstorm Cdo
1st Cav Regiment
Makassar KNIL Cdo
4th KNIL Regiment
Marinier Battalion
Roodenburg Cdo
II Marechausse Cdo
3rd Cav Sqdn
Lijfwacht Cav Sqdn
I Marechausse Cdo
1st KNIL Regiment
4th Cav Sqdn
III Landstorm Cdo
Tjepoe Cdo
II Landstorm Cdo
III/IV Barisan Cdo
Groep Zud
I/II Barisan Cdo
Makassar RK Cdo
6th Cav Sqdn
Riouw Cdo
2nd KNIL Regiment
W Borneo KNIL Battalion
VI Landstorm Cdo
6th KNIL Regiment
VII KNIL Battalion
I Landstorm Cdo
IV Landstorm Cdo
Mobiele Battalion
2/15 Punjab Battalion
A-I-Ld AA Battalion
VLG-III Sup Groep
KNI Leger
VLG-II Sup Groep
VLG-I Sup Groep
NI-MLD
1st Bombay Construction Battalion
1st Bengal Construction Battalion
24th NZ Pioneer Coy
HQ I KNIL Division
ABDA
VkA-2 Sup Afd
224 Group Base Force
1st Madras Construction Battalion
Broome RAN Stn Base Force
ML-KNIL
VLG-V Sup Groep
A-II-Ld AA Battalion
Hedland RAN Stn Base Force
VkA-4 Sup Afd
HQ II KNIL Division
221 Group Base Force
VkA-1 Sup Afd
VkA-3 Sup Afd
Pathan Construction Battalion
VLG-IV Sup Groep
A-III-Ld AA Battalion
HQ III KNIL Division
106th RN Base Force


Attachment (1)

< Message edited by castor troy -- 12/3/2021 3:46:17 PM >


_____________________________


(in reply to castor troy)
Post #: 287
RE: AAR 42 - 12/3/2021 3:50:49 PM   
RangerJoe


Posts: 13450
Joined: 11/16/2015
From: My Mother, although my Father had some small part.
Status: offline
He should have at least had some SCTFs move in first, small ones with DDs first, the CLs and DDs, then CAs with DDs and maybe even BBs. The BBs could have been set to bombard. If he has taken so many losses already to his surface fleet, then he should try to figure out where your ships are and attack elsewhere.

_____________________________

Seek peace but keep your gun handy.

I'm not a complete idiot, some parts are missing!

“Illegitemus non carborundum est (“Don’t let the bastards grind you down”).”
― Julia Child


(in reply to castor troy)
Post #: 288
RE: AAR 42 - 12/3/2021 3:53:25 PM   
castor troy


Posts: 14330
Joined: 8/23/2004
From: Austria
Status: offline
what didn't happen yesterday happened today, KB launches strikes against our fleet but the fleet was fully massed at Koepang, resulting in a Turkey shoot over Timor... bit of luck here though as Thunderstorms during the morning made the torpedo bombers completely useless, halve of them attacking from impossible angles anyways... while I didn't even expect that many bombers of an alpha strike getting through a 200+ CAP the losses in ships are not worth it and KB's bomber arm was mauled...

for the loss of 2 Buffalos (the single Warhawk was lost on a transfer flight to Port Moresby) ABDA/USAAF fighter forces downed over 150 enemy carrier aircraft... note the 2 Jakes lost on the ground, means we got another heavy cruiser...

Timor is out of scope for the Japanese, the question is if they turtle up on Java, Borneo and Mindanao now or try to clear the area all down to Darwin which is impossible IMO but on the other hand, having the Allied sitting that far in the SRA at the end of 42 can mean more than just a small threat as there is no doubt that this will be the main axis of advance, all other theatres are just secondary in such a strategic situation...


Attachment (1)

_____________________________


(in reply to castor troy)
Post #: 289
RE: AAR 42 - 12/3/2021 3:56:59 PM   
castor troy


Posts: 14330
Joined: 8/23/2004
From: Austria
Status: offline
quote:

ORIGINAL: RangerJoe

He should have at least had some SCTFs move in first, small ones with DDs first, the CLs and DDs, then CAs with DDs and maybe even BBs. The BBs could have been set to bombard. If he has taken so many losses already to his surface fleet, then he should try to figure out where your ships are and attack elsewhere.


True, I don't disagree. But he's sporting more than one operation at the moment and I think he does have quite a lot of ships in the yards also. The IJN has started to take losses when force Z sunk a BB at Balikpapan quite early in the war. I have no idea how many BBs and heavy cruisers he has operational at the moment, five BBs are reported sunk and I guess that should be spot on with at least three more being damaged.

I think he surely doesn't have that many operational ships left to do what you have described above. I actually expected a surface combat TF goint to Koepang during the night (the one I thought my nav search didn't spot) so the plan was to have the fleet go on normal speed and arrive during the day even if Force Z is night fighting capable.

< Message edited by castor troy -- 12/3/2021 4:00:31 PM >


_____________________________


(in reply to RangerJoe)
Post #: 290
RE: AAR 42 - 12/3/2021 5:29:44 PM   
BBfanboy


Posts: 18046
Joined: 8/4/2010
From: Winnipeg, MB
Status: offline
Well done CT! Losses for the Allies may sting, but for the Japanese those losses are a crippling wound.

The presence of Mabels in the KB strike indicate how heavy his loss in carrier TBs have been. Now they are worse. Pilot quality will be hurt accordingly too.

The two KB strikes also seem to illustrate what I was contending in another thread - when AA and/or CAP is heavy, the bombers won't always go for the most valuable ships. The torpedoes launched at an MMS and AMc(s) suggest pilots wanting to drop their ordnance and scram! The big ships have nasty AA so the easiest targets are picked.

_____________________________

No matter how bad a situation is, you can always make it worse. - Chris Hadfield : An Astronaut's Guide To Life On Earth

(in reply to RangerJoe)
Post #: 291
RE: AAR 42 - 12/3/2021 5:36:44 PM   
castor troy


Posts: 14330
Joined: 8/23/2004
From: Austria
Status: offline
quote:

ORIGINAL: BBfanboy

Well done CT! Losses for the Allies may sting, but for the Japanese those losses are a crippling wound.

The presence of Mabels in the KB strike indicate how heavy his loss in carrier TBs have been. Now they are worse. Pilot quality will be hurt accordingly too.

The two KB strikes also seem to illustrate what I was contending in another thread - when AA and/or CAP is heavy, the bombers won't always go for the most valuable ships. The torpedoes launched at an MMS and AMc(s) suggest pilots wanting to drop their ordnance and scram! The big ships have nasty AA so the easiest targets are picked.


Thanks. Like stated above, most bomber attacks went against the warships though, probably 95% of all attacks.

I think the IJN is close to being crippled, including KB. When Wasp arrives at Darwin I will probably take the next chance to engage KB.

< Message edited by castor troy -- 12/3/2021 5:37:46 PM >


_____________________________


(in reply to BBfanboy)
Post #: 292
RE: AAR 42 - 12/3/2021 6:11:21 PM   
jedwardpita


Posts: 68
Joined: 1/19/2021
Status: offline
Very exciting last two days. I have not seen a better high reward/low risk trap.


(in reply to castor troy)
Post #: 293
RE: AAR 42 - 12/3/2021 11:14:55 PM   
Wirraway_Ace


Posts: 1400
Joined: 10/8/2007
From: Austin / Brisbane
Status: offline

quote:

ORIGINAL: castor troy


I'd say 1) plus the decision it's too late and there is no chance to take Timor.

The area North of Darwin has been turned into a triangle of Death with built up bases that have been heavily reinforced plus the fact that literally my whole Navy is in the area. Same goes for most of the airforce and lots of troops that could be brought as reinforcements if the Japanese would manage to land considerable force somewhere. Bombarding Koepang would lead to his ships running into Force Z plus the whole USN and big parts of the RN. Air offensive is out of scope too IMO, he would face several hundred Warhawks with 70/70 pilots that would drain his air offensive. I could add in my P-38 flying circus which I haven't even employed yet with 50 replacement P-38 in the pool.


This was very nicely done as a strategy, and given the loses he has suffered to his ground troops, carrier groups and surface ships prior to the battle, I think victory for him was very, very unlikely. That your tactics were better, just made it worse (or better, depending on the perspective).

(in reply to castor troy)
Post #: 294
RE: AAR 42 - 12/4/2021 11:15:28 AM   
castor troy


Posts: 14330
Joined: 8/23/2004
From: Austria
Status: offline

quote:

ORIGINAL: jedwardpita

Very exciting last two days. I have not seen a better high reward/low risk trap.


Thanks and welcome to the AAR. Wasn't much of a trap though and I fear it could have played out better as the losses to ships (I hate losing ships) were severe. Even if it was a victory overall I think the loss of a BB is not something that gets public applause in the States.

_____________________________


(in reply to jedwardpita)
Post #: 295
RE: AAR 42 - 12/4/2021 11:22:06 AM   
castor troy


Posts: 14330
Joined: 8/23/2004
From: Austria
Status: offline
quote:

ORIGINAL: Wirraway_Ace


quote:

ORIGINAL: castor troy


I'd say 1) plus the decision it's too late and there is no chance to take Timor.

The area North of Darwin has been turned into a triangle of Death with built up bases that have been heavily reinforced plus the fact that literally my whole Navy is in the area. Same goes for most of the airforce and lots of troops that could be brought as reinforcements if the Japanese would manage to land considerable force somewhere. Bombarding Koepang would lead to his ships running into Force Z plus the whole USN and big parts of the RN. Air offensive is out of scope too IMO, he would face several hundred Warhawks with 70/70 pilots that would drain his air offensive. I could add in my P-38 flying circus which I haven't even employed yet with 50 replacement P-38 in the pool.


This was very nicely done as a strategy, and given the loses he has suffered to his ground troops, carrier groups and surface ships prior to the battle, I think victory for him was very, very unlikely. That your tactics were better, just made it worse (or better, depending on the perspective).


Yeah, we're fully seeing snowball effects already. If you can bog down the Japanese or at least really slow them down it's giving you the chance to build a brick wall. The Japanese are strong, very strong, as long as they are on the move and snowball the Allied which can go well into 43, sometimes even beyond but one failed operation can turn everything upside down.

I think Mundy isn't aware of the real situation in this area, it's a no go zone for him but which Japanese player would think about not taking Kendari, Manado, Ambon, Koepang and all the area around it in mid 42? I'm pretty sure we will decide the war North of Darwin but I also think he would be critized not trying to attack into this area which is absolutely vital for the Japanese. Just take Balikpapan, it's been fully suppressed by my B-17 and it's going to be hard to get any oil/fuel out of the area and we have a hr about no strategic bombing of Japanese held Allied territory. Without that hr he would long have all oilrigs destroyed on Southern Borneo.

< Message edited by castor troy -- 12/4/2021 11:23:07 AM >


_____________________________


(in reply to Wirraway_Ace)
Post #: 296
RE: AAR 42 - 12/4/2021 1:56:25 PM   
castor troy


Posts: 14330
Joined: 8/23/2004
From: Austria
Status: offline
AFTER ACTION REPORTS FOR May 10, 42
--------------------------------------------------------------------------------
ASW attack near Bima at 63,109

Japanese Ships
DD Fuyo
DD Karukaya

Allied Ships
SS Truant

SS Truant is sighted by escort
DD Karukaya fails to find sub, continues to search...
Escort abandons search for sub


--------------------------------------------------------------------------------
Night Air attack on Malang , at 55,105

Weather in hex: Moderate rain

Raid detected at 20 NM, estimated altitude 9,000 feet.
Estimated time to target is 7 minutes

Japanese aircraft
G4M1 Betty x 3

Japanese aircraft losses
G4M1 Betty: 4 damaged


not even a handful of Betties bomb Malang today... my flak can easily reach 5000ft...


Aircraft Attacking:
3 x G4M1 Betty bombing from 5000 feet
Airfield Attack: 2 x 250 kg GP Bomb, 4 x 60 kg GP Bomb


--------------------------------------------------------------------------------

Ground combat at Malang (55,105)

Japanese Bombardment attack

Attacking force 61407 troops, 701 guns, 132 vehicles, Assault Value = 1896

Defending force 58580 troops, 476 guns, 180 vehicles, Assault Value = 1250

Japanese ground losses:
32 casualties reported
Squads: 0 destroyed, 2 disabled
Non Combat: 0 destroyed, 0 disabled
Engineers: 0 destroyed, 0 disabled

Allied ground losses:
128 casualties reported
Squads: 1 destroyed, 12 disabled
Non Combat: 0 destroyed, 1 disabled
Engineers: 0 destroyed, 0 disabled

Assaulting units:
1st Ind Engineer Regiment
III/66th Naval Guard Unit
10th Garrison Unit
33rd Division
6th Indpt SNLF Coy
4th Ind Engineer Regiment
88th Naval Guard Unit
1st Engineer Co
Miura Det
79th Garrison Battalion
1st Raiding Regiment
2nd Sasebo SNLF Coy
91st Naval Guard Unit
II/19th Naval Guard Unit
41st Infantry Regiment
1st Indpt SNLF Coy
55th Division
4th Division
46th Naval Guard Unit
15th Naval Guard Unit
Maizuru 2nd SNLF
8th Tank Regiment
67th Naval Guard Unit
II/66th Nav Gd /2
16th Army
10th RF Gun Battalion
36th Field AA Battalion
5th Mortar Battalion
25th Army
8th RF Gun Battalion
23rd Medium Field Artillery Regiment
41st Field AA Battalion
9th RF Gun Battalion
3rd Mortar Battalion
17th Medium Field Artillery Regiment
11th RF Gun Battalion

Defending units:
VI Landstorm Cdo
1st Cav Regiment
Roodenburg Cdo
III/IV Barisan Cdo
II Marechausse Cdo
Marinier Battalion
4th Cav Sqdn
I Landstorm Cdo
2nd KNIL Regiment
VII KNIL Battalion
Lijfwacht Cav Sqdn
S Borneo KNIL Battalion
III Landstorm Cdo
I Marechausse Cdo
1st KNIL Regiment
V Landstorm Cdo
Makassar RK Cdo
I/II Barisan Cdo
Tjepoe Cdo
II Landstorm Cdo
Riouw Cdo
W Borneo KNIL Battalion
3rd Cav Sqdn
Groep Zud
IV Landstorm Cdo
Makassar KNIL Cdo
6th KNIL Regiment
Prajoeda Cdo
6th Cav Sqdn
4th KNIL Regiment
Mobiele Battalion
Tjilitjap Cdo
2/15 Punjab Battalion
VLG-V Sup Groep
HQ I KNIL Division
224 Group Base Force
NI-MLD
24th NZ Pioneer Coy
VkA-3 Sup Afd
221 Group Base Force
VkA-4 Sup Afd
VLG-IV Sup Groep
VLG-III Sup Groep
A-I-Ld AA Battalion
A-II-Ld AA Battalion
VLG-I Sup Groep
ABDA
Pathan Construction Battalion
A-III-Ld AA Battalion
VkA-2 Sup Afd
HQ III KNIL Division
VLG-II Sup Groep
HQ II KNIL Division
Broome RAN Stn Base Force
ML-KNIL
1st Madras Construction Battalion
1st Bengal Construction Battalion
KNI Leger
VkA-1 Sup Afd
Hedland RAN Stn Base Force
1st Bombay Construction Battalion
106th RN Base Force


--------------------------------------------------------------------------------

Ground combat at Padang (44,85)

Japanese Bombardment attack

Attacking force 5490 troops, 36 guns, 0 vehicles, Assault Value = 183

Defending force 2390 troops, 11 guns, 0 vehicles, Assault Value = 66

Assaulting units:
42nd Naval Guard Unit
43rd Naval Guard Unit
63rd Naval Guard Unit

Defending units:
Padang Cdo
Emmahaven Defenses
Pakanbaroe Cdo


air losses indicate that another IJN CL or CA went down today...


Attachment (1)

_____________________________


(in reply to castor troy)
Post #: 297
RE: AAR 42 - 12/4/2021 1:59:39 PM   
castor troy


Posts: 14330
Joined: 8/23/2004
From: Austria
Status: offline
AFTER ACTION REPORTS FOR May 11, 42
--------------------------------------------------------------------------------
Day Time Surface Combat, near Malang at 55,105, Range 18,000 Yards

Japanese Ships
CA Tone
CA Furutaka
DD Michishio
DD Murasame
DD Harusame
DD Hatsuharu
AK Sakito Maru
AMC Awata Maru
xAK Teiyo Maru
xAK Yamakaze Maru
AMC Nosiro Maru
xAK Nitisan Maru
xAK Koei Maru
AMC Bankok Maru
xAK Lima Maru
xAK Lyons Maru
xAK Maebasi Maru
xAK Matumoto Maru
xAK Tokiwa Maru
xAK Toyohasi Maru
xAK Toyooka Maru
xAK Dakar Maru
xAK Delagoa Maru
xAK Bordeaux Maru
xAK Hauraki Maru
xAK Norfolk Maru
xAK Venice Maru
xAK Syoan Maru
xAK London Maru
LSD Akitsu Maru
xAP Dairen Maru
xAP Keihuku Maru
xAP Ussuri Maru
xAP Kasado Maru
xAP Ukishima Maru

Allied Ships
TM-4
TM-5
TM-6
TM-7, Shell hits 1, and is sunk
TM-8, Shell hits 1, and is sunk
TM-9, Shell hits 1, and is sunk


enemy naval presence at Malang made me send in some Dutch PTs but they end up engaging the enemy during daylight which didn't do them any good...


Maximum visibility in Partly Cloudy Conditions: 28,000 yards
CONTACT: Allied lookouts spot Japanese task force at 20,000 yards
Range closes to 18,000 yards...
CONTACT: Japanese lookouts spot Allied task force at 18,000 yards
Der Vanik J. gains tactical advantage
DD Hatsuharu engages TM-9 at 18,000 yards
DD Michishio engages TM-9 at 18,000 yards
Range closes to 16,000 yards
AMC Bankok Maru , AMC Nosiro Maru , AMC Awata Maru ,
LSD Akitsu Maru , AK Sakito Maru , xAP Ukishima Maru ,
xAP Kasado Maru , xAP Ussuri Maru , xAP Keihuku Maru ,
xAP Dairen Maru , xAK London Maru , xAK Syoan Maru ,
xAK Venice Maru , xAK Norfolk Maru , xAK Hauraki Maru ,
xAK Bordeaux Maru , xAK Delagoa Maru , xAK Dakar Maru ,
xAK Toyooka Maru , xAK Toyohasi Maru , xAK Tokiwa Maru ,
xAK Matumoto Maru screened from combat
- escorted by DD Hatsuharu , DD Harusame , DD Murasame
CA Tone engages TM-9 at 16,000 yards
TM-8 sunk by DD Michishio at 16,000 yards
Range closes to 13,000 yards
CA Tone engages TM-7 at 13,000 yards
DD Hatsuharu engages TM-9 at 13,000 yards
DD Harusame engages TM-5 at 13,000 yards
Range closes to 12,000 yards
DD Hatsuharu engages TM-7 at 12,000 yards
DD Murasame engages TM-7 at 12,000 yards
TM-9 engages xAK Yamakaze Maru at 12,000 yards
Range closes to 11,000 yards
AMC Bankok Maru , AMC Nosiro Maru , AMC Awata Maru ,
LSD Akitsu Maru , AK Sakito Maru , xAP Ukishima Maru ,
xAP Kasado Maru , xAP Ussuri Maru , xAP Keihuku Maru ,
xAP Dairen Maru , xAK London Maru , xAK Syoan Maru ,
xAK Venice Maru , xAK Norfolk Maru , xAK Hauraki Maru ,
xAK Bordeaux Maru , xAK Delagoa Maru , xAK Dakar Maru ,
xAK Toyooka Maru , xAK Toyohasi Maru , xAK Tokiwa Maru ,
xAK Matumoto Maru screened from combat
- escorted by DD Hatsuharu , DD Harusame , DD Murasame
DD Michishio engages TM-9 at 11,000 yards
TM-9 engages xAK Koei Maru at 11,000 yards
TM-9 engages xAK Nitisan Maru at 11,000 yards
Range closes to 8,000 yards
AMC Bankok Maru , AMC Nosiro Maru , AMC Awata Maru ,
LSD Akitsu Maru , AK Sakito Maru , xAP Ukishima Maru ,
xAP Kasado Maru , xAP Ussuri Maru , xAP Keihuku Maru ,
xAP Dairen Maru , xAK London Maru , xAK Syoan Maru ,
xAK Venice Maru , xAK Norfolk Maru , xAK Hauraki Maru ,
xAK Bordeaux Maru , xAK Delagoa Maru , xAK Dakar Maru ,
xAK Toyooka Maru , xAK Toyohasi Maru , xAK Tokiwa Maru ,
xAK Matumoto Maru , xAK Maebasi Maru , xAK Lyons Maru ,
xAK Lima Maru , xAK Koei Maru screened from combat
- escorted by DD Hatsuharu , DD Harusame , DD Murasame
TM-9 engages xAK Yamakaze Maru at 8,000 yards
xAP Ussuri Maru collides with xAK Syoan Maru at 55 , 105
AMC Bankok Maru , AMC Nosiro Maru , AMC Awata Maru ,
LSD Akitsu Maru , AK Sakito Maru , xAP Ukishima Maru ,
xAP Kasado Maru , xAP Ussuri Maru , xAP Keihuku Maru ,
xAP Dairen Maru , xAK London Maru , xAK Syoan Maru ,
xAK Venice Maru , xAK Norfolk Maru , xAK Hauraki Maru ,
xAK Bordeaux Maru , xAK Delagoa Maru , xAK Dakar Maru ,
xAK Toyooka Maru , xAK Toyohasi Maru , xAK Tokiwa Maru ,
xAK Matumoto Maru , xAK Maebasi Maru , xAK Lyons Maru screened from combat
- escorted by DD Hatsuharu , DD Harusame , DD Murasame
TM-9 engages xAK Koei Maru at 8,000 yards
DD Michishio engages TM-6 at 8,000 yards
AMC Bankok Maru , AMC Nosiro Maru , AMC Awata Maru ,
LSD Akitsu Maru , AK Sakito Maru , xAP Ukishima Maru ,
xAP Kasado Maru , xAP Ussuri Maru , xAP Keihuku Maru ,
xAP Dairen Maru , xAK London Maru , xAK Syoan Maru ,
xAK Venice Maru , xAK Norfolk Maru , xAK Hauraki Maru ,
xAK Bordeaux Maru , xAK Delagoa Maru , xAK Dakar Maru ,
xAK Toyooka Maru , xAK Toyohasi Maru , xAK Tokiwa Maru screened from combat
- escorted by DD Hatsuharu , DD Murasame
CA Furutaka engages TM-9 at 8,000 yards
DD Michishio engages TM-9 at 8,000 yards
Range increases to 10,000 yards
AMC Bankok Maru , AMC Nosiro Maru , AMC Awata Maru ,
LSD Akitsu Maru , AK Sakito Maru , xAP Ukishima Maru ,
xAP Kasado Maru , xAP Ussuri Maru , xAP Keihuku Maru ,
xAP Dairen Maru , xAK London Maru , xAK Syoan Maru ,
xAK Venice Maru , xAK Norfolk Maru , xAK Hauraki Maru ,
xAK Bordeaux Maru , xAK Delagoa Maru screened from combat
- escorted by DD Hatsuharu , DD Harusame
TM-9 engages xAK Koei Maru at 10,000 yards
TM-6 engages xAK Koei Maru at 10,000 yards
DD Michishio engages TM-5 at 10,000 yards
TM-9 engages xAK Toyohasi Maru at 10,000 yards
TM-9 engages xAK Teiyo Maru at 10,000 yards
Range closes to 8,000 yards
TM-6 engages xAK Yamakaze Maru at 8,000 yards
DD Harusame engages TM-9 at 8,000 yards
DD Murasame engages TM-5 at 8,000 yards
Range increases to 9,000 yards
AMC Bankok Maru , AMC Nosiro Maru , AMC Awata Maru ,
LSD Akitsu Maru , AK Sakito Maru , xAP Ukishima Maru ,
xAP Kasado Maru , xAP Ussuri Maru , xAP Keihuku Maru ,
xAP Dairen Maru , xAK London Maru , xAK Syoan Maru screened from combat
- escorted by DD Harusame
DD Hatsuharu engages TM-9 at 9,000 yards
Range increases to 11,000 yards
TM-9 sunk by CA Furutaka at 11,000 yards
orders Allied TF to disengage
Range closes to 7,000 yards
AMC Bankok Maru , AMC Nosiro Maru , AMC Awata Maru ,
LSD Akitsu Maru , AK Sakito Maru , xAP Ukishima Maru ,
xAP Kasado Maru , xAP Ussuri Maru , xAP Keihuku Maru ,
xAP Dairen Maru , xAK London Maru , xAK Syoan Maru ,
xAK Venice Maru , xAK Norfolk Maru , xAK Hauraki Maru ,
xAK Bordeaux Maru , xAK Delagoa Maru , xAK Dakar Maru ,
xAK Toyooka Maru , xAK Toyohasi Maru , xAK Tokiwa Maru ,
xAK Matumoto Maru , xAK Maebasi Maru screened from combat
- escorted by DD Hatsuharu , DD Harusame , DD Murasame
TM-7 sunk by CA Tone at 7,000 yards
Range increases to 13,000 yards
CA Tone engages TM-4 at 13,000 yards
Range increases to 18,000 yards
AMC Bankok Maru screened from combat
AMC Nosiro Maru engages TM-6 at 18,000 yards
orders Allied TF to disengage
Range increases to 24,000 yards
AMC Bankok Maru , AMC Nosiro Maru , AMC Awata Maru ,
LSD Akitsu Maru , AK Sakito Maru , xAP Ukishima Maru ,
xAP Kasado Maru , xAP Ussuri Maru , xAP Keihuku Maru ,
xAP Dairen Maru , xAK London Maru , xAK Syoan Maru ,
xAK Venice Maru , xAK Norfolk Maru , xAK Hauraki Maru screened from combat
CA Tone engages TM-6 at 24,000 yards
Range increases to 30,000 yards
AMC Bankok Maru , AMC Nosiro Maru , AMC Awata Maru ,
LSD Akitsu Maru , AK Sakito Maru , xAP Ukishima Maru ,
xAP Kasado Maru , xAP Ussuri Maru , xAP Keihuku Maru ,
xAP Dairen Maru , xAK London Maru , xAK Syoan Maru ,
xAK Venice Maru screened from combat
- escorted by DD Hatsuharu , DD Harusame
CA Tone engages TM-6 at 30,000 yards
Task forces break off...


--------------------------------------------------------------------------------
Amphibious Assault at Tandjoengbalai (47,78)

TF 22 troops unloading over beach at Tandjoengbalai, 47,78

Japanese ground losses:
296 casualties reported
Squads: 1 destroyed, 85 disabled
Non Combat: 1 destroyed, 34 disabled
Engineers: 0 destroyed, 0 disabled

17 troops of a SNLF Inf Squad 41 accidentally lost during unload of 86th Nav Gd /2
15 Support troops accidentally lost during unload of 86th Nav Gd /4


--------------------------------------------------------------------------------
Pre-Invasion action off Malang (55,105)
Defensive Guns engage approaching landing force

795 Coastal gun shots fired in defense.

Japanese Ships
CA Furutaka
CA Tone
DD Hatsuharu
DD Harusame
AMC Bankok Maru
DD Michishio

Japanese ground losses:
282 casualties reported
Squads: 3 destroyed, 29 disabled
Non Combat: 0 destroyed, 40 disabled
Engineers: 0 destroyed, 0 disabled

Allied ground losses:
23 casualties reported
Squads: 0 destroyed, 1 disabled
Non Combat: 0 destroyed, 1 disabled
Engineers: 0 destroyed, 0 disabled

CA Tone firing at 2nd KNIL Regiment
DD Hatsuharu firing at 2nd KNIL Regiment
DD Harusame firing at 1st KNIL Regiment
Defensive Guns fire at approaching troops in landing craft at 4,000 yards
Defensive Guns fire at approaching troops in landing craft at 1,000 yards


--------------------------------------------------------------------------------
Amphibious Assault at Malang (55,105)

TF 32 troops unloading over beach at Malang, 55,105

Japanese ground losses:
758 casualties reported
Squads: 7 destroyed, 196 disabled
Non Combat: 1 destroyed, 187 disabled
Engineers: 0 destroyed, 0 disabled
Guns lost 48 (0 destroyed, 48 disabled)

17 troops of a IJA Inf Squad lost in surf during unload of 20th Infantry Rgt /2
17 troops of a IJA Inf Squad accidentally lost during unload of 9th Infantry Rgt /3
17 troops of a IJA Inf Squad lost in surf during unload of 20th Infantry Rgt
17 troops of a IJA Inf Squad accidentally lost during unload of Guards Mixed Bde /4
20 troops of a IJA Hy Inf Sqd 41 lost overboard during unload of I./4th Infantry Bn /3
17 troops of a IJA Inf Squad accidentally lost during unload of Kimura Det /4
15 Support troops lost from landing craft during unload of 9th Infantry Rgt /5


--------------------------------------------------------------------------------

Ground combat at Malang (55,105)

Japanese Bombardment attack

Attacking force 61837 troops, 701 guns, 132 vehicles, Assault Value = 2068

Defending force 58604 troops, 476 guns, 180 vehicles, Assault Value = 1252

Allied ground losses:
73 casualties reported
Squads: 1 destroyed, 14 disabled
Non Combat: 0 destroyed, 2 disabled
Engineers: 0 destroyed, 1 disabled

Assaulting units:
33rd Division
8th Tank Regiment
II/19th Naval Guard Unit
91st Naval Guard Unit
Kimura Det /1
1st Engineer Co
1st Ind Engineer Regiment
III/66th Naval Guard Unit
20th Infantry Rgt /3
Miura Det
1st Raiding Regiment
4th Division
Maizuru 2nd SNLF
2nd Sasebo SNLF Coy
II./4th Infantry Bn /1
III./4th Infantry Bn /3
Guards Mixed Brigade
46th Naval Guard Unit
4th Ind Engineer Regiment
55th Division
67th Naval Guard Unit
10th Garrison Unit
15th Naval Guard Unit
1st Indpt SNLF Coy
88th Naval Guard Unit
6th Indpt SNLF Coy
79th Garrison Battalion
9th Infantry Rgt /1
I./4th Infantry Bn /1
41st Infantry Regiment
II/66th Nav Gd /2
17th Medium Field Artillery Regiment
3rd Mortar Battalion
9th RF Gun Battalion
5th Mortar Battalion
36th Field AA Battalion
16th Army
8th RF Gun Battalion
10th RF Gun Battalion
41st Field AA Battalion
23rd Medium Field Artillery Regiment
25th Army
11th RF Gun Battalion

Defending units:
1st Cav Regiment
Makassar KNIL Cdo
S Borneo KNIL Battalion
Riouw Cdo
VI Landstorm Cdo
W Borneo KNIL Battalion
Tjilitjap Cdo
I/II Barisan Cdo
I Landstorm Cdo
2nd KNIL Regiment
Tjepoe Cdo
V Landstorm Cdo
III/IV Barisan Cdo
IV Landstorm Cdo
Makassar RK Cdo
II Marechausse Cdo
1st KNIL Regiment
Roodenburg Cdo
III Landstorm Cdo
Lijfwacht Cav Sqdn
Groep Zud
3rd Cav Sqdn
6th KNIL Regiment
Prajoeda Cdo
I Marechausse Cdo
6th Cav Sqdn
Marinier Battalion
II Landstorm Cdo
Mobiele Battalion
4th Cav Sqdn
VII KNIL Battalion
4th KNIL Regiment
2/15 Punjab Battalion
Hedland RAN Stn Base Force
Pathan Construction Battalion
HQ II KNIL Division
221 Group Base Force
VLG-II Sup Groep
ML-KNIL
KNI Leger
Broome RAN Stn Base Force
HQ I KNIL Division
224 Group Base Force
VLG-V Sup Groep
VLG-IV Sup Groep
A-III-Ld AA Battalion
VkA-2 Sup Afd
VkA-1 Sup Afd
1st Bombay Construction Battalion
1st Madras Construction Battalion
VLG-I Sup Groep
NI-MLD
24th NZ Pioneer Coy
VkA-4 Sup Afd
HQ III KNIL Division
A-II-Ld AA Battalion
A-I-Ld AA Battalion
1st Bengal Construction Battalion
ABDA
VkA-3 Sup Afd
VLG-III Sup Groep
106th RN Base Force


--------------------------------------------------------------------------------

Ground combat at Padang (44,85)

Japanese Bombardment attack

Attacking force 5490 troops, 36 guns, 0 vehicles, Assault Value = 183

Defending force 2390 troops, 11 guns, 0 vehicles, Assault Value = 66

Assaulting units:
43rd Naval Guard Unit
42nd Naval Guard Unit
63rd Naval Guard Unit

Defending units:
Padang Cdo
Emmahaven Defenses
Pakanbaroe Cdo


--------------------------------------------------------------------------------

Ground combat at Malang (55,105)

Allied Bombardment attack

Attacking force 35101 troops, 278 guns, 45 vehicles, Assault Value = 1241

Defending force 80880 troops, 822 guns, 389 vehicles, Assault Value = 2068

Japanese ground losses:
241 casualties reported
Squads: 0 destroyed, 52 disabled
Non Combat: 1 destroyed, 7 disabled
Engineers: 0 destroyed, 0 disabled

Assaulting units:
V Landstorm Cdo
II Marechausse Cdo
III Landstorm Cdo
VII KNIL Battalion
Makassar KNIL Cdo
4th Cav Sqdn
4th KNIL Regiment
2nd KNIL Regiment
W Borneo KNIL Battalion
I/II Barisan Cdo
1st KNIL Regiment
6th Cav Sqdn
S Borneo KNIL Battalion
Makassar RK Cdo
II Landstorm Cdo
III/IV Barisan Cdo
Prajoeda Cdo
Tjilitjap Cdo
3rd Cav Sqdn
Groep Zud
Riouw Cdo
I Marechausse Cdo
I Landstorm Cdo
VI Landstorm Cdo
Lijfwacht Cav Sqdn
Roodenburg Cdo
Marinier Battalion
IV Landstorm Cdo
Mobiele Battalion
6th KNIL Regiment
Tjepoe Cdo
1st Cav Regiment
2/15 Punjab Battalion
VkA-4 Sup Afd
VkA-3 Sup Afd
VLG-II Sup Groep
1st Madras Construction Battalion
VLG-I Sup Groep
NI-MLD
224 Group Base Force
Hedland RAN Stn Base Force
HQ III KNIL Division
VkA-1 Sup Afd
VLG-III Sup Groep
1st Bombay Construction Battalion
ML-KNIL
A-I-Ld AA Battalion
HQ II KNIL Division
HQ I KNIL Division
ABDA
A-III-Ld AA Battalion
A-II-Ld AA Battalion
1st Bengal Construction Battalion
VkA-2 Sup Afd
VLG-IV Sup Groep
Broome RAN Stn Base Force
KNI Leger
VLG-V Sup Groep
24th NZ Pioneer Coy
Pathan Construction Battalion
221 Group Base Force
106th RN Base Force

Defending units:
79th Garrison Battalion
2nd Sasebo SNLF Coy
15th Naval Guard Unit
Maizuru 2nd SNLF
4th Ind Engineer Regiment
91st Naval Guard Unit
20th Infantry Rgt /3
55th Division
9th Infantry Rgt /1
8th Tank Regiment
1st Indpt SNLF Coy
4th Division
33rd Division
III./4th Infantry Bn /3
I./4th Infantry Bn /1
Guards Mixed Brigade
1st Engineer Co
Miura Det
Kimura Det /1
II/19th Naval Guard Unit
III/66th Naval Guard Unit
67th Naval Guard Unit
1st Ind Engineer Regiment
10th Garrison Unit
1st Raiding Regiment
88th Naval Guard Unit
41st Infantry Regiment
II./4th Infantry Bn /1
6th Indpt SNLF Coy
46th Naval Guard Unit
II/66th Nav Gd /2
36th Field AA Battalion
41st Field AA Battalion
8th RF Gun Battalion
25th Army
10th RF Gun Battalion
5th Mortar Battalion
17th Medium Field Artillery Regiment
23rd Medium Field Artillery Regiment
9th RF Gun Battalion
3rd Mortar Battalion
16th Army
11th RF Gun Battalion


Lamson and Canberra are still fire fighting at Koepang and it doesn't look good as damage is going up daily... we're flying in nav support and bring more with fast transport APDs but it looks like both ships are doomed...


Attachment (1)

_____________________________


(in reply to castor troy)
Post #: 298
RE: AAR 42 - 12/4/2021 2:04:00 PM   
castor troy


Posts: 14330
Joined: 8/23/2004
From: Austria
Status: offline
AFTER ACTION REPORTS FOR May 12, 42
--------------------------------------------------------------------------------
Invasion Support action off Malang (55,105)
Defensive Guns engage approaching landing force

842 Coastal gun shots fired in defense.

Japanese Ships
CA Furutaka
CA Tone
DD Hatsuharu
DD Murasame
DD Michishio
AMC Bankok Maru
AMC Nosiro Maru
AMC Awata Maru
xAK Hauraki Maru
xAP Dairen Maru
xAK Matumoto Maru

Japanese ground losses:
308 casualties reported
Squads: 0 destroyed, 10 disabled
Non Combat: 1 destroyed, 25 disabled
Engineers: 0 destroyed, 0 disabled
Guns lost 3 (2 destroyed, 1 disabled)

Allied ground losses:
11 casualties reported
Squads: 0 destroyed, 0 disabled
Non Combat: 0 destroyed, 1 disabled
Engineers: 0 destroyed, 0 disabled

DD Murasame firing at 6th KNIL Regiment
AMC Bankok Maru firing at 1st KNIL Regiment
AMC Nosiro Maru firing at 1st KNIL Regiment
AMC Awata Maru firing at 4th KNIL Regiment
AMC Bankok Maru fired at enemy troops
AMC Nosiro Maru fired at enemy troops
AMC Awata Maru fired at enemy troops
Defensive Guns fire at approaching troops in landing craft at 5,000 yards
Defensive Guns fire at approaching troops in landing craft at 1,000 yards


--------------------------------------------------------------------------------
Night Time Surface Combat, near Malang at 55,105, Range 2,000 Yards


Japanese Ships
CA Tone
CA Furutaka
DD Michishio
DD Murasame
DD Harusame
DD Hatsuharu
AK Sakito Maru
AMC Awata Maru
xAK Teiyo Maru
xAK Yamakaze Maru
AMC Nosiro Maru
xAK Nitisan Maru, Torpedo hits 1, on fire, heavy damage
xAK Koei Maru
AMC Bankok Maru
xAK Lima Maru
xAK Lyons Maru
xAK Maebasi Maru
xAK Matumoto Maru
xAK Tokiwa Maru
xAK Toyohasi Maru
xAK Toyooka Maru
xAK Dakar Maru
xAK Delagoa Maru
xAK Bordeaux Maru
xAK Hauraki Maru
xAK Norfolk Maru
xAK Venice Maru
xAK Syoan Maru
xAK London Maru
LSD Akitsu Maru
xAP Dairen Maru
xAP Keihuku Maru
xAP Ussuri Maru
xAP Kasado Maru
xAP Ukishima Maru

Allied Ships
TM-4
TM-5
TM-6


the Dutch go in again and this time we get some results...


Allied Ships Reported to be Approaching!
Japanese TF suspends unloading operations and begins to get underway
Reduced sighting due to 7% moonlight
Maximum visibility in Partly Cloudy Conditions and 7% moonlight: 2,000 yards
Range closes to 11,000 yards...
Range closes to 10,000 yards...
Range closes to 9,000 yards...
Range closes to 8,000 yards...
Range closes to 7,000 yards...
Range closes to 6,000 yards...
Range closes to 5,000 yards...
Range closes to 4,000 yards...
Range closes to 3,000 yards...
Range closes to 2,000 yards...
CONTACT: Japanese lookouts spot Allied task force at 2,000 yards
CONTACT: Allied lookouts spot Japanese task force at 2,000 yards
CA Furutaka engages TM-6 at 2,000 yards
CA Tone engages TM-6 at 2,000 yards
Range increases to 3,000 yards
LSD Akitsu Maru , AK Sakito Maru , xAP Ukishima Maru ,
xAP Kasado Maru , xAP Ussuri Maru , xAP Keihuku Maru ,
xAP Dairen Maru , xAK London Maru , xAK Syoan Maru ,
xAK Venice Maru , xAK Norfolk Maru screened from combat
- escorted by DD Hatsuharu
DD Hatsuharu engages TM-4 at 3,000 yards
Range closes to 2,000 yards
LSD Akitsu Maru , AK Sakito Maru , xAP Ukishima Maru ,
xAP Kasado Maru , xAP Ussuri Maru , xAP Keihuku Maru ,
xAP Dairen Maru , xAK London Maru , xAK Syoan Maru ,
xAK Venice Maru , xAK Norfolk Maru , xAK Hauraki Maru ,
xAK Bordeaux Maru , xAK Delagoa Maru , xAK Dakar Maru ,
xAK Toyooka Maru , xAK Toyohasi Maru , xAK Tokiwa Maru screened from combat
- escorted by DD Hatsuharu , DD Murasame
CA Furutaka engages TM-6 at 2,000 yards
DD Michishio engages TM-4 at 2,000 yards
CA Tone engages TM-4 at 2,000 yards
TM-6 engages xAK Venice Maru at 2,000 yards
TM-6 engages xAK Dakar Maru at 2,000 yards
TM-6 engages xAK Toyohasi Maru at 2,000 yards
Range increases to 3,000 yards
LSD Akitsu Maru , AK Sakito Maru , xAP Ukishima Maru ,
xAP Kasado Maru , xAP Ussuri Maru , xAP Keihuku Maru ,
xAP Dairen Maru , xAK London Maru , xAK Syoan Maru ,
xAK Venice Maru , xAK Norfolk Maru , xAK Hauraki Maru ,
xAK Bordeaux Maru , xAK Delagoa Maru , xAK Dakar Maru ,
xAK Toyooka Maru , xAK Toyohasi Maru , xAK Tokiwa Maru ,
xAK Matumoto Maru , xAK Maebasi Maru , xAK Lyons Maru ,
xAK Lima Maru , xAK Koei Maru , xAK Nitisan Maru ,
xAK Yamakaze Maru screened from combat
- escorted by DD Hatsuharu , DD Harusame , DD Murasame
AMC Awata Maru engages TM-6 at 3,000 yards
LSD Akitsu Maru , AK Sakito Maru , xAP Ukishima Maru ,
xAP Kasado Maru , xAP Ussuri Maru , xAP Keihuku Maru ,
xAP Dairen Maru , xAK London Maru , xAK Syoan Maru ,
xAK Venice Maru , xAK Norfolk Maru , xAK Hauraki Maru ,
xAK Bordeaux Maru , xAK Delagoa Maru , xAK Dakar Maru ,
xAK Toyooka Maru screened from combat
- escorted by DD Hatsuharu , DD Murasame
TM-5 engages xAK Nitisan Maru at 3,000 yards
DD Michishio engages TM-5 at 3,000 yards
Provoost R. orders Allied TF to disengage
CA Furutaka engages TM-6 at 3,000 yards
Range increases to 6,000 yards
LSD Akitsu Maru screened from combat
Task forces break off...


--------------------------------------------------------------------------------
TF 6 encounters mine field at Palembang (48,91)

Japanese Ships
TK Tennan Maru, Mine hits 1, on fire, heavy damage


Argonaut placed a minefield at Japan's most important port within the SRA and a tanker runs straight into it... if the ship is full of fuel/oil it is doomed...


--------------------------------------------------------------------------------
Night Air attack on Malang , at 55,105

Weather in hex: Severe storms

Raid detected at 13 NM, estimated altitude 9,000 feet.
Estimated time to target is 4 minutes

Japanese aircraft
G4M1 Betty x 3

Japanese aircraft losses
G4M1 Betty: 1 damaged
G4M1 Betty: 1 destroyed by flak

Aircraft Attacking:
3 x G4M1 Betty bombing from 5000 feet
Airfield Attack: 2 x 250 kg GP Bomb, 4 x 60 kg GP Bomb


--------------------------------------------------------------------------------
Night Time Surface Combat, near Malang at 55,105, Range 1,000 Yards

Japanese Ships
CA Tone
CA Furutaka
DD Michishio
DD Murasame
DD Harusame
DD Hatsuharu
AK Sakito Maru
AMC Awata Maru
xAK Teiyo Maru
xAK Yamakaze Maru
AMC Nosiro Maru
xAK Koei Maru
AMC Bankok Maru
xAK Lima Maru
xAK Lyons Maru
xAK Maebasi Maru
xAK Matumoto Maru
xAK Tokiwa Maru
xAK Toyohasi Maru
xAK Toyooka Maru
xAK Dakar Maru
xAK Delagoa Maru
xAK Bordeaux Maru
xAK Hauraki Maru
xAK Norfolk Maru
xAK Venice Maru
xAK Syoan Maru, Torpedo hits 2, on fire, heavy damage
xAK London Maru
LSD Akitsu Maru, Shell hits 2
xAP Dairen Maru
xAP Keihuku Maru
xAP Ussuri Maru
xAP Kasado Maru
xAP Ukishima Maru

Allied Ships
TM-10
TM-11
TM-12
TM-13
TM-14
TM-15, Shell hits 6, and is sunk


another round and two torps slam into a freighter...

Japanese ground losses:
64 casualties reported
Squads: 1 destroyed, 1 disabled
Non Combat: 0 destroyed, 3 disabled
Engineers: 0 destroyed, 0 disabled

Reduced sighting due to 3% moonlight
Maximum visibility in Partly Cloudy Conditions and 3% moonlight: 1,000 yards
Range closes to 11,000 yards...
Range closes to 10,000 yards...
Range closes to 9,000 yards...
Range closes to 8,000 yards...
Range closes to 7,000 yards...
Range closes to 6,000 yards...
Range closes to 5,000 yards...
Range closes to 4,000 yards...
Range closes to 3,000 yards...
Range closes to 2,000 yards...
Range closes to 1,000 yards...
DD Hatsuharu engages TM-15 at 1,000 yards
DD Harusame engages TM-15 at 1,000 yards
TM-15 sunk by DD Murasame at 1,000 yards
TM-10 engages LSD Akitsu Maru at 1,000 yards
Range increases to 2,000 yards
DD Harusame engages TM-11 at 2,000 yards
TM-10 engages DD Murasame at 2,000 yards
TM-14 engages xAK Syoan Maru at 2,000 yards
Task forces break off...


--------------------------------------------------------------------------------
Invasion Support action off Malang (55,105)
Defensive Guns engage approaching landing force

454 Coastal gun shots fired in defense.

Japanese Ships
AMC Bankok Maru
DD Hatsuharu
xAP Dairen Maru
xAK Yamakaze Maru
xAK Norfolk Maru

Japanese ground losses:
245 casualties reported
Squads: 2 destroyed, 7 disabled
Non Combat: 5 destroyed, 17 disabled
Engineers: 0 destroyed, 0 disabled

Defensive Guns fire at approaching troops in landing craft at 2,000 yards


--------------------------------------------------------------------------------
Invasion Support action off Malang (55,105)
Defensive Guns engage approaching landing force

442 Coastal gun shots fired in defense.

Japanese Ships
AMC Bankok Maru
xAK Bordeaux Maru
DD Hatsuharu

Japanese ground losses:
254 casualties reported
Squads: 4 destroyed, 0 disabled
Non Combat: 0 destroyed, 29 disabled
Engineers: 0 destroyed, 0 disabled

Defensive Guns fire at approaching troops in landing craft at 1,000 yards


--------------------------------------------------------------------------------
Day Time Surface Combat, near Malang at 55,105, Range 22,000 Yards

Japanese Ships
CA Tone
CA Furutaka
DD Michishio
DD Murasame
DD Harusame
DD Hatsuharu
AK Sakito Maru
AMC Awata Maru
xAK Teiyo Maru
xAK Yamakaze Maru
AMC Nosiro Maru
xAK Koei Maru
AMC Bankok Maru
xAK Lima Maru
xAK Lyons Maru
xAK Maebasi Maru
xAK Matumoto Maru
xAK Tokiwa Maru
xAK Toyohasi Maru
xAK Toyooka Maru
xAK Dakar Maru
xAK Delagoa Maru
xAK Bordeaux Maru
xAK Hauraki Maru
xAK Norfolk Maru
xAK Venice Maru
xAK Syoan Maru, heavy damage
xAK London Maru
LSD Akitsu Maru
xAP Dairen Maru
xAP Keihuku Maru
xAP Ussuri Maru
xAP Kasado Maru
xAP Ukishima Maru

Allied Ships
TM-4
TM-5
TM-6

Allied Ships Reported to be Approaching!
Japanese TF suspends unloading operations and begins to get underway
Maximum visibility in Partly Cloudy Conditions: 28,000 yards
CONTACT: Japanese lookouts spot Allied task force at 22,000 yards
CONTACT: Allied lookouts spot Japanese task force at 22,000 yards
Both TF attempt to withdraw!
Range increases to 22,000 yards...
Both Task Forces evade combat


--------------------------------------------------------------------------------
Invasion Support action off Malang (55,105)
Defensive Guns engage approaching landing force

454 Coastal gun shots fired in defense.

Japanese Ships
AMC Bankok Maru
DD Hatsuharu
xAK Lyons Maru
xAK Syoan Maru, heavy damage
xAK Bordeaux Maru

Japanese ground losses:
287 casualties reported
Squads: 2 destroyed, 0 disabled
Non Combat: 17 destroyed, 20 disabled
Engineers: 0 destroyed, 0 disabled
Guns lost 2 (1 destroyed, 1 disabled)

Defensive Guns fire at approaching troops in landing craft at 2,000 yards


--------------------------------------------------------------------------------

Ground combat at Malang (55,105)

Japanese Deliberate attack

Attacking force 79132 troops, 859 guns, 215 vehicles, Assault Value = 2193

Defending force 58606 troops, 476 guns, 180 vehicles, Assault Value = 1251

Japanese adjusted assault: 657

Allied adjusted defense: 3082

Japanese assault odds: 1 to 4 (fort level 4)

Combat modifiers
Defender: terrain(+), forts(+), experience(-)
Attacker:

Japanese ground losses:
9725 casualties reported
Squads: 271 destroyed, 519 disabled
Non Combat: 5 destroyed, 89 disabled
Engineers: 4 destroyed, 31 disabled
Guns lost 133 (19 destroyed, 114 disabled)
Vehicles lost 8 (1 destroyed, 7 disabled)

Allied ground losses:
3134 casualties reported
Squads: 43 destroyed, 248 disabled
Non Combat: 5 destroyed, 54 disabled
Engineers: 0 destroyed, 6 disabled


Mundy is stubborn enough to reduce all my strongholds no matter where... no doubt he will bring enough troops to also take Malang but at what cost? The Dutch "mountaineers" hold their lines and the enemy suffers horrendous losses...


Assaulting units:
41st Infantry Regiment
20th Infantry Regiment
4th Division
15th Naval Guard Unit
2nd Sasebo SNLF Coy
79th Garrison Battalion
II./4th Infantry Battalion
91st Naval Guard Unit
9th Infantry Regiment
67th Naval Guard Unit
1st Raiding Regiment
33rd Division
4th Ind Engineer Regiment
46th Naval Guard Unit
I./4th Infantry Battalion
Miura Det
88th Naval Guard Unit
Maizuru 2nd SNLF
55th Division
Guards Mixed Brigade
6th Indpt SNLF Coy
1st Indpt SNLF Coy
1st Ind Engineer Regiment
10th Garrison Unit
64th Naval Guard Unit
II/19th Naval Guard Unit
Kimura Det /1
1st Engineer Co
8th Tank Regiment
III./4th Infantry Battalion
III/66th Naval Guard Unit
II/66th Nav Gd /2
8th RF Gun Battalion
23rd Medium Field Artillery Regiment
3rd Mortar Battalion
10th RF Gun Battalion
41st Field AA Battalion
5th Mortar Battalion
9th RF Gun Battalion
17th Medium Field Artillery Regiment
25th Army
36th Field AA Battalion
16th Army
11th RF Gun Battalion

Defending units:
Roodenburg Cdo
Riouw Cdo
III Landstorm Cdo
6th Cav Sqdn
III/IV Barisan Cdo
I Marechausse Cdo
V Landstorm Cdo
II Landstorm Cdo
Tjepoe Cdo
1st Cav Regiment
Lijfwacht Cav Sqdn
W Borneo KNIL Battalion
I Landstorm Cdo
6th KNIL Regiment
1st KNIL Regiment
3rd Cav Sqdn
4th KNIL Regiment
S Borneo KNIL Battalion
Makassar RK Cdo
Mobiele Battalion
Prajoeda Cdo
II Marechausse Cdo
Marinier Battalion
4th Cav Sqdn
VII KNIL Battalion
I/II Barisan Cdo
Makassar KNIL Cdo
2nd KNIL Regiment
VI Landstorm Cdo
Tjilitjap Cdo
Groep Zud
IV Landstorm Cdo
2/15 Punjab Battalion
VkA-3 Sup Afd
224 Group Base Force
VkA-4 Sup Afd
VLG-I Sup Groep
1st Bengal Construction Battalion
NI-MLD
1st Bombay Construction Battalion
A-III-Ld AA Battalion
VkA-2 Sup Afd
VkA-1 Sup Afd
HQ I KNIL Division
ML-KNIL
VLG-III Sup Groep
221 Group Base Force
A-II-Ld AA Battalion
24th NZ Pioneer Coy
Hedland RAN Stn Base Force
A-I-Ld AA Battalion
KNI Leger
Broome RAN Stn Base Force
VLG-IV Sup Groep
VLG-V Sup Groep
HQ III KNIL Division
1st Madras Construction Battalion
Pathan Construction Battalion
VLG-II Sup Groep
HQ II KNIL Division
ABDA
106th RN Base Force


--------------------------------------------------------------------------------

Ground combat at Padang (44,85)

Japanese Deliberate attack

Attacking force 5490 troops, 36 guns, 0 vehicles, Assault Value = 183

Defending force 2382 troops, 11 guns, 0 vehicles, Assault Value = 66

Japanese adjusted assault: 44

Allied adjusted defense: 91

Japanese assault odds: 1 to 2 (fort level 1)

Combat modifiers
Defender: terrain(+), fatigue(-), morale(-), experience(-)
Attacker: leaders(-), fatigue(-)

Japanese ground losses:
229 casualties reported
Squads: 1 destroyed, 33 disabled
Non Combat: 0 destroyed, 0 disabled
Engineers: 0 destroyed, 0 disabled

Allied ground losses:
168 casualties reported
Squads: 0 destroyed, 10 disabled
Non Combat: 0 destroyed, 7 disabled
Engineers: 0 destroyed, 0 disabled

Assaulting units:
42nd Naval Guard Unit
43rd Naval Guard Unit
63rd Naval Guard Unit

Defending units:
Emmahaven Defenses
Padang Cdo
Pakanbaroe Cdo


--------------------------------------------------------------------------------

Ground combat at Malang (55,105)

Allied Bombardment attack

Attacking force 32989 troops, 278 guns, 45 vehicles, Assault Value = 1010

Defending force 79139 troops, 893 guns, 388 vehicles, Assault Value = 1471

Assaulting units:
IV Landstorm Cdo
4th Cav Sqdn
Tjepoe Cdo
Makassar KNIL Cdo
I Landstorm Cdo
S Borneo KNIL Battalion
Prajoeda Cdo
V Landstorm Cdo
1st Cav Regiment
W Borneo KNIL Battalion
VI Landstorm Cdo
I Marechausse Cdo
6th KNIL Regiment
VII KNIL Battalion
4th KNIL Regiment
1st KNIL Regiment
Mobiele Battalion
Makassar RK Cdo
I/II Barisan Cdo
II Marechausse Cdo
3rd Cav Sqdn
III/IV Barisan Cdo
Tjilitjap Cdo
Marinier Battalion
Groep Zud
2nd KNIL Regiment
2/15 Punjab Battalion
VkA-1 Sup Afd
A-II-Ld AA Battalion
Hedland RAN Stn Base Force
HQ III KNIL Division
VLG-IV Sup Groep
A-I-Ld AA Battalion
VLG-V Sup Groep
1st Madras Construction Battalion
1st Bombay Construction Battalion
KNI Leger
II Landstorm Cdo
VLG-I Sup Groep
ML-KNIL
6th Cav Sqdn
A-III-Ld AA Battalion
VkA-3 Sup Afd
221 Group Base Force
Broome RAN Stn Base Force
Riouw Cdo
1st Bengal Construction Battalion
HQ II KNIL Division
24th NZ Pioneer Coy
224 Group Base Force
III Landstorm Cdo
Roodenburg Cdo
HQ I KNIL Division
Pathan Construction Battalion
VkA-4 Sup Afd
Lijfwacht Cav Sqdn
VLG-II Sup Groep
VkA-2 Sup Afd
NI-MLD
ABDA
VLG-III Sup Groep
106th RN Base Force

Defending units:
4th Ind Engineer Regiment
Miura Det
1st Raiding Regiment
9th Infantry Regiment
88th Naval Guard Unit
1st Engineer Co
64th Naval Guard Unit
8th Tank Regiment
4th Division
1st Indpt SNLF Coy
55th Division
6th Indpt SNLF Coy
10th Garrison Unit
III./4th Infantry Battalion
Maizuru 2nd SNLF
1st Ind Engineer Regiment
33rd Division
46th Naval Guard Unit
Guards Mixed Brigade
Kimura Det /1
41st Infantry Regiment
41st Field AA Battalion
25th Army
20th Infantry Regiment
II/19th Naval Guard Unit
15th Naval Guard Unit
16th Army
36th Field AA Battalion
III/66th Naval Guard Unit
8th RF Gun Battalion
11th RF Gun Battalion
II./4th Infantry Battalion
5th Mortar Battalion
91st Naval Guard Unit
3rd Mortar Battalion
17th Medium Field Artillery Regiment
2nd Sasebo SNLF Coy
79th Garrison Battalion
67th Naval Guard Unit
23rd Medium Field Artillery Regiment
10th RF Gun Battalion
9th RF Gun Battalion
I./4th Infantry Battalion
II/66th Nav Gd /2


Attachment (1)

_____________________________


(in reply to castor troy)
Post #: 299
RE: AAR 42 - 12/4/2021 4:04:40 PM   
Wirraway_Ace


Posts: 1400
Joined: 10/8/2007
From: Austin / Brisbane
Status: offline

quote:

ORIGINAL: castor troy


quote:

ORIGINAL: jedwardpita

Very exciting last two days. I have not seen a better high reward/low risk trap.


Thanks and welcome to the AAR. Wasn't much of a trap though and I fear it could have played out better as the losses to ships (I hate losing ships) were severe. Even if it was a victory overall I think the loss of a BB is not something that gets public applause in the States.

You can keep it out of the papers for a while, as was done with the loss of Lexington after the Battle of the Coral Sea.

(in reply to castor troy)
Post #: 300
Page:   <<   < prev  8 9 [10] 11 12   next >   >>
All Forums >> [New Releases from Matrix Games] >> War in the Pacific: Admiral's Edition >> After Action Reports >> RE: AAR 42 Page: <<   < prev  8 9 [10] 11 12   next >   >>
Jump to:


New Messages No New Messages
Hot Topic w/ New Messages Hot Topic w/o New Messages
Locked w/ New Messages Locked w/o New Messages
 Post New Thread
 Reply to Message
 Post New Poll
 Submit Vote
 Delete My Own Post
 Delete My Own Thread
 Rate Posts


Forum Software © ASPPlayground.NET Advanced Edition 2.4.5 ANSI

2.156